After a week of endless rain, and a full weekend of prepping, September 7th, 2014 was finally Myrtle’s exterior painting day! The weather forecast was excellent, and we were ready to make mid-century magic. My original plan had been to follow in the footsteps of a DIY blog I found online, where the couple painted their vintage trailer using exterior grade house paint and paint guns. I thought their results looked pretty nice. My husband, an automotive technician and body tech, took one look at the process I was planning to follow for the trailer painting, and graciously offered his professional assistance on this phase of Myrtle’s renovation. He assured me that though the DuPont auto paint would cost more, I would be far more pleased with the results, and with the durability and shimmer that an automotive clear-coat would give to the finished product. He also seemed just that wee bit appalled at the idea of painting any type of motoring vehicle with house paint, as well as downright unwilling to let me load up his automotive paint guns with Glidden Semi-Gloss.

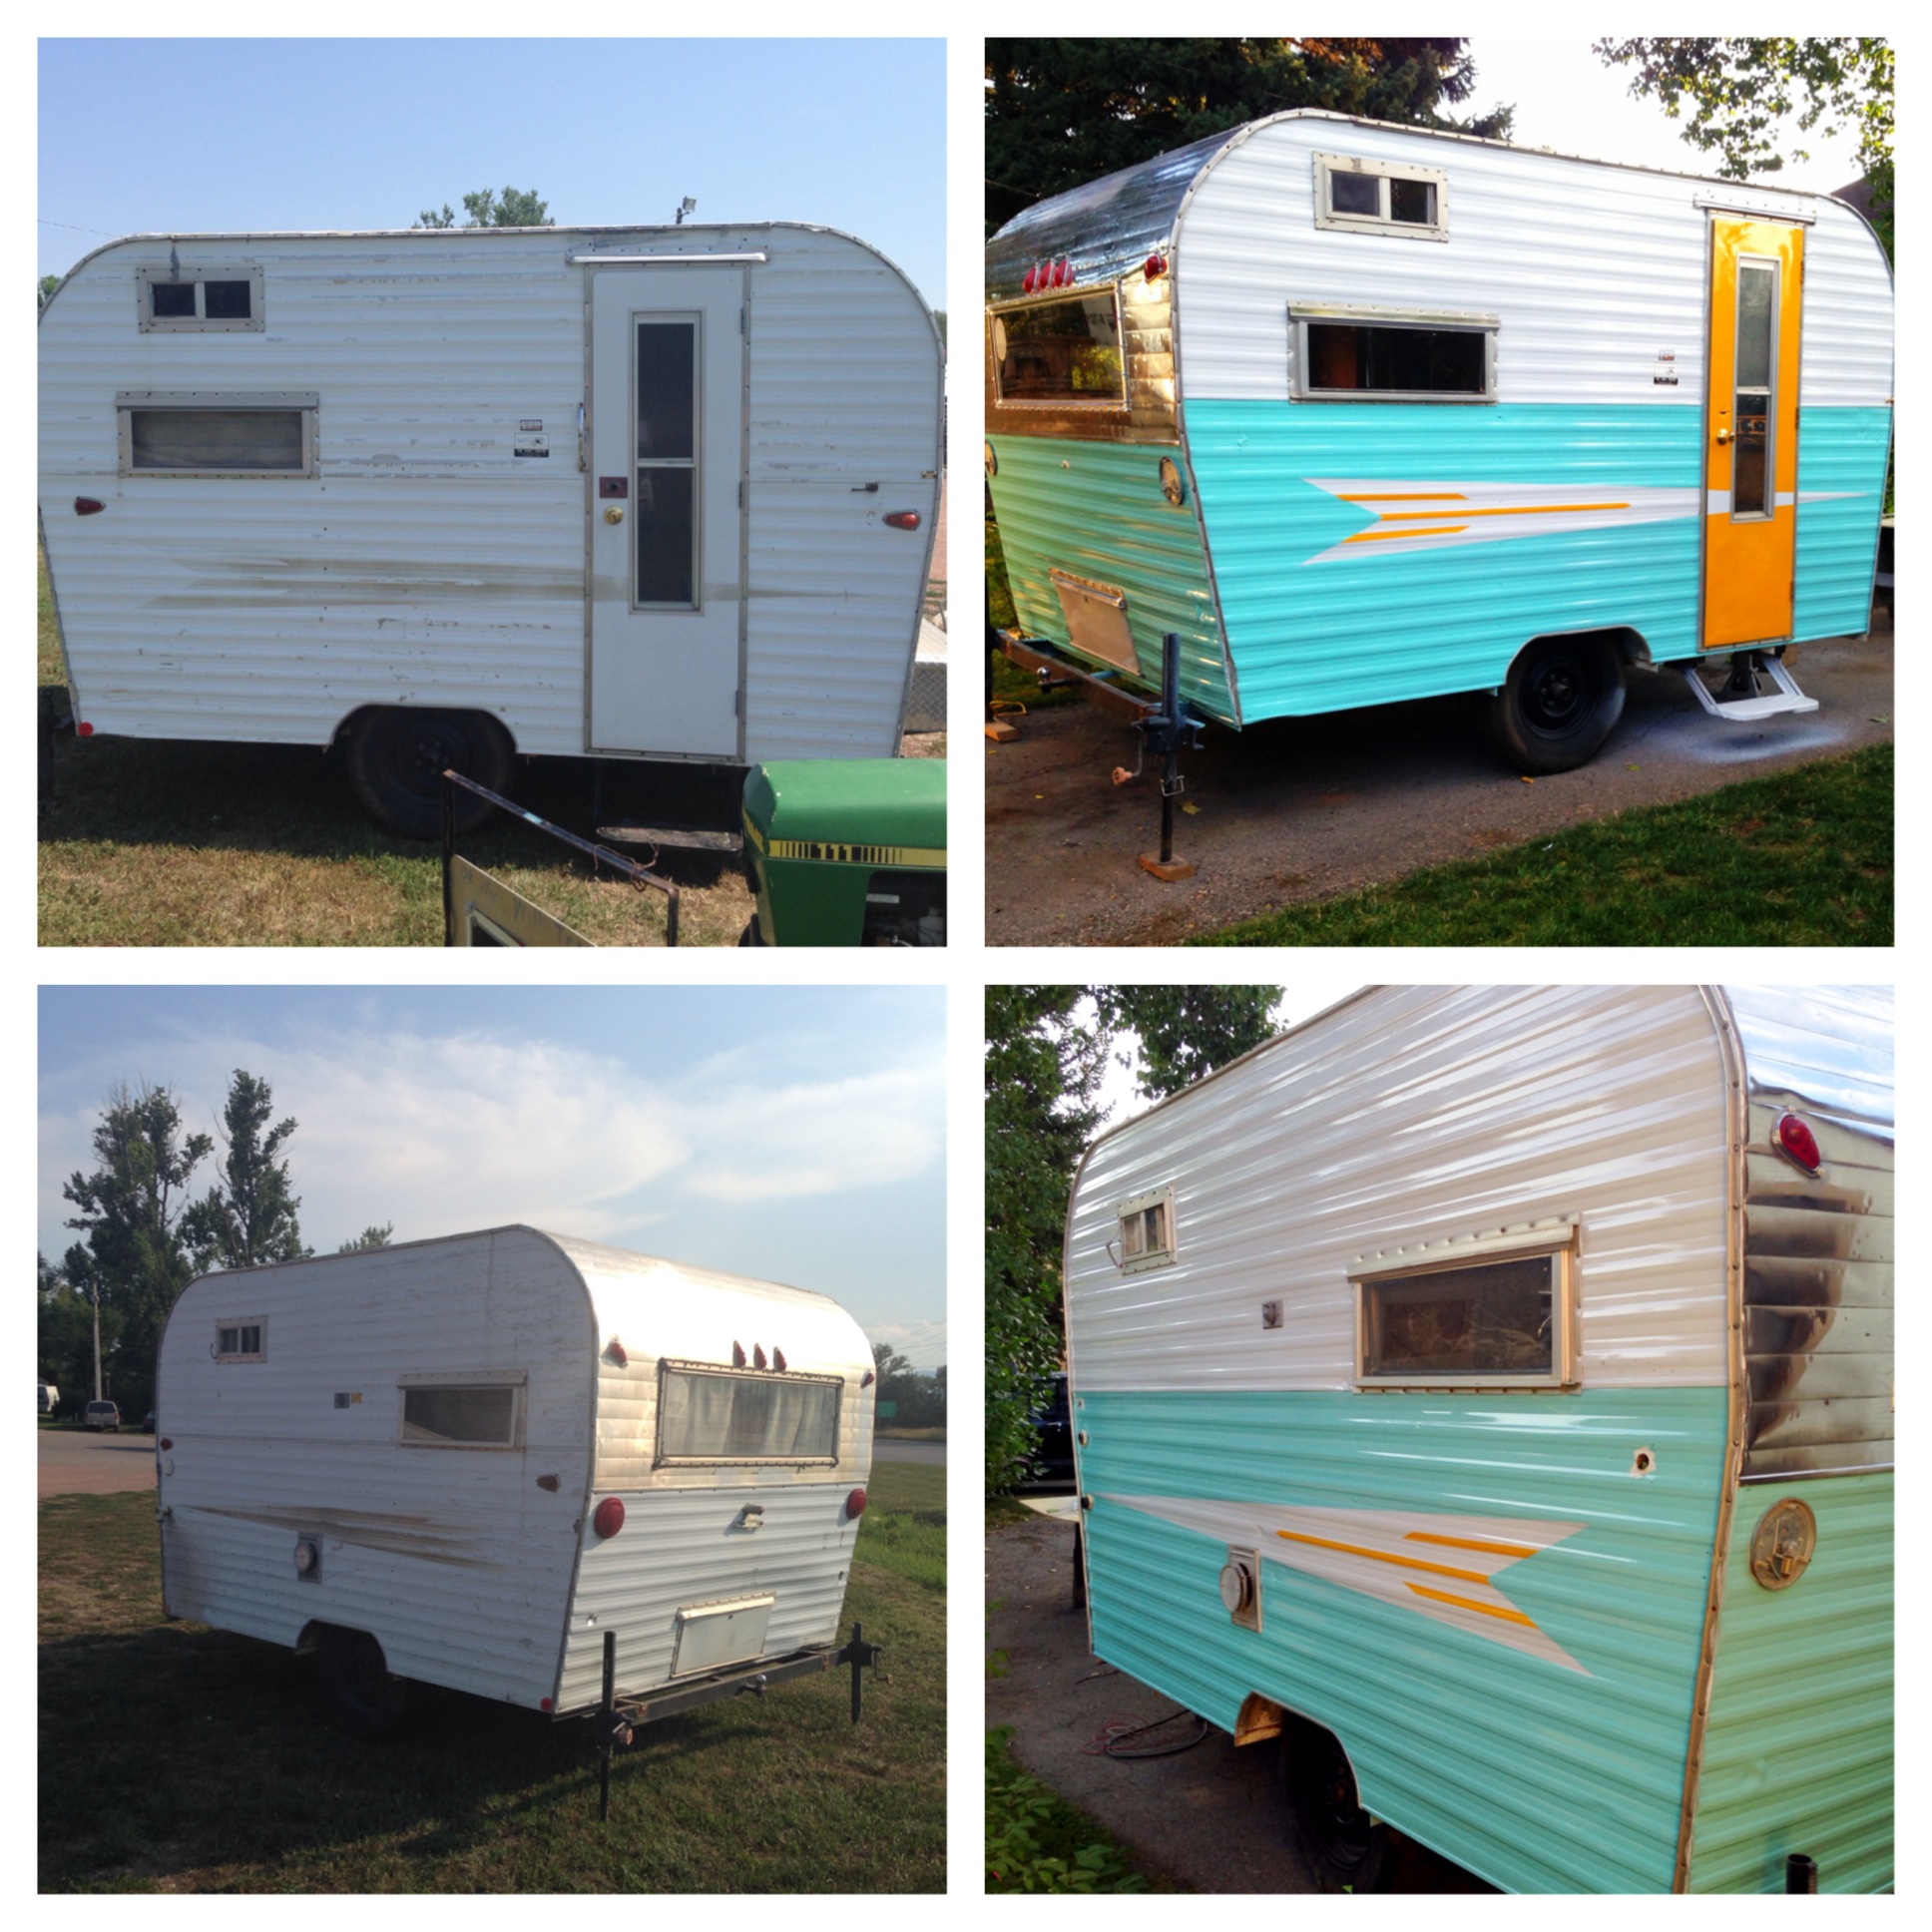
Myrtle needs a paint job. (Ignore the ‘Olive’ nametag -I tried a few honorifics before I figured out what Myrtle’s name was)
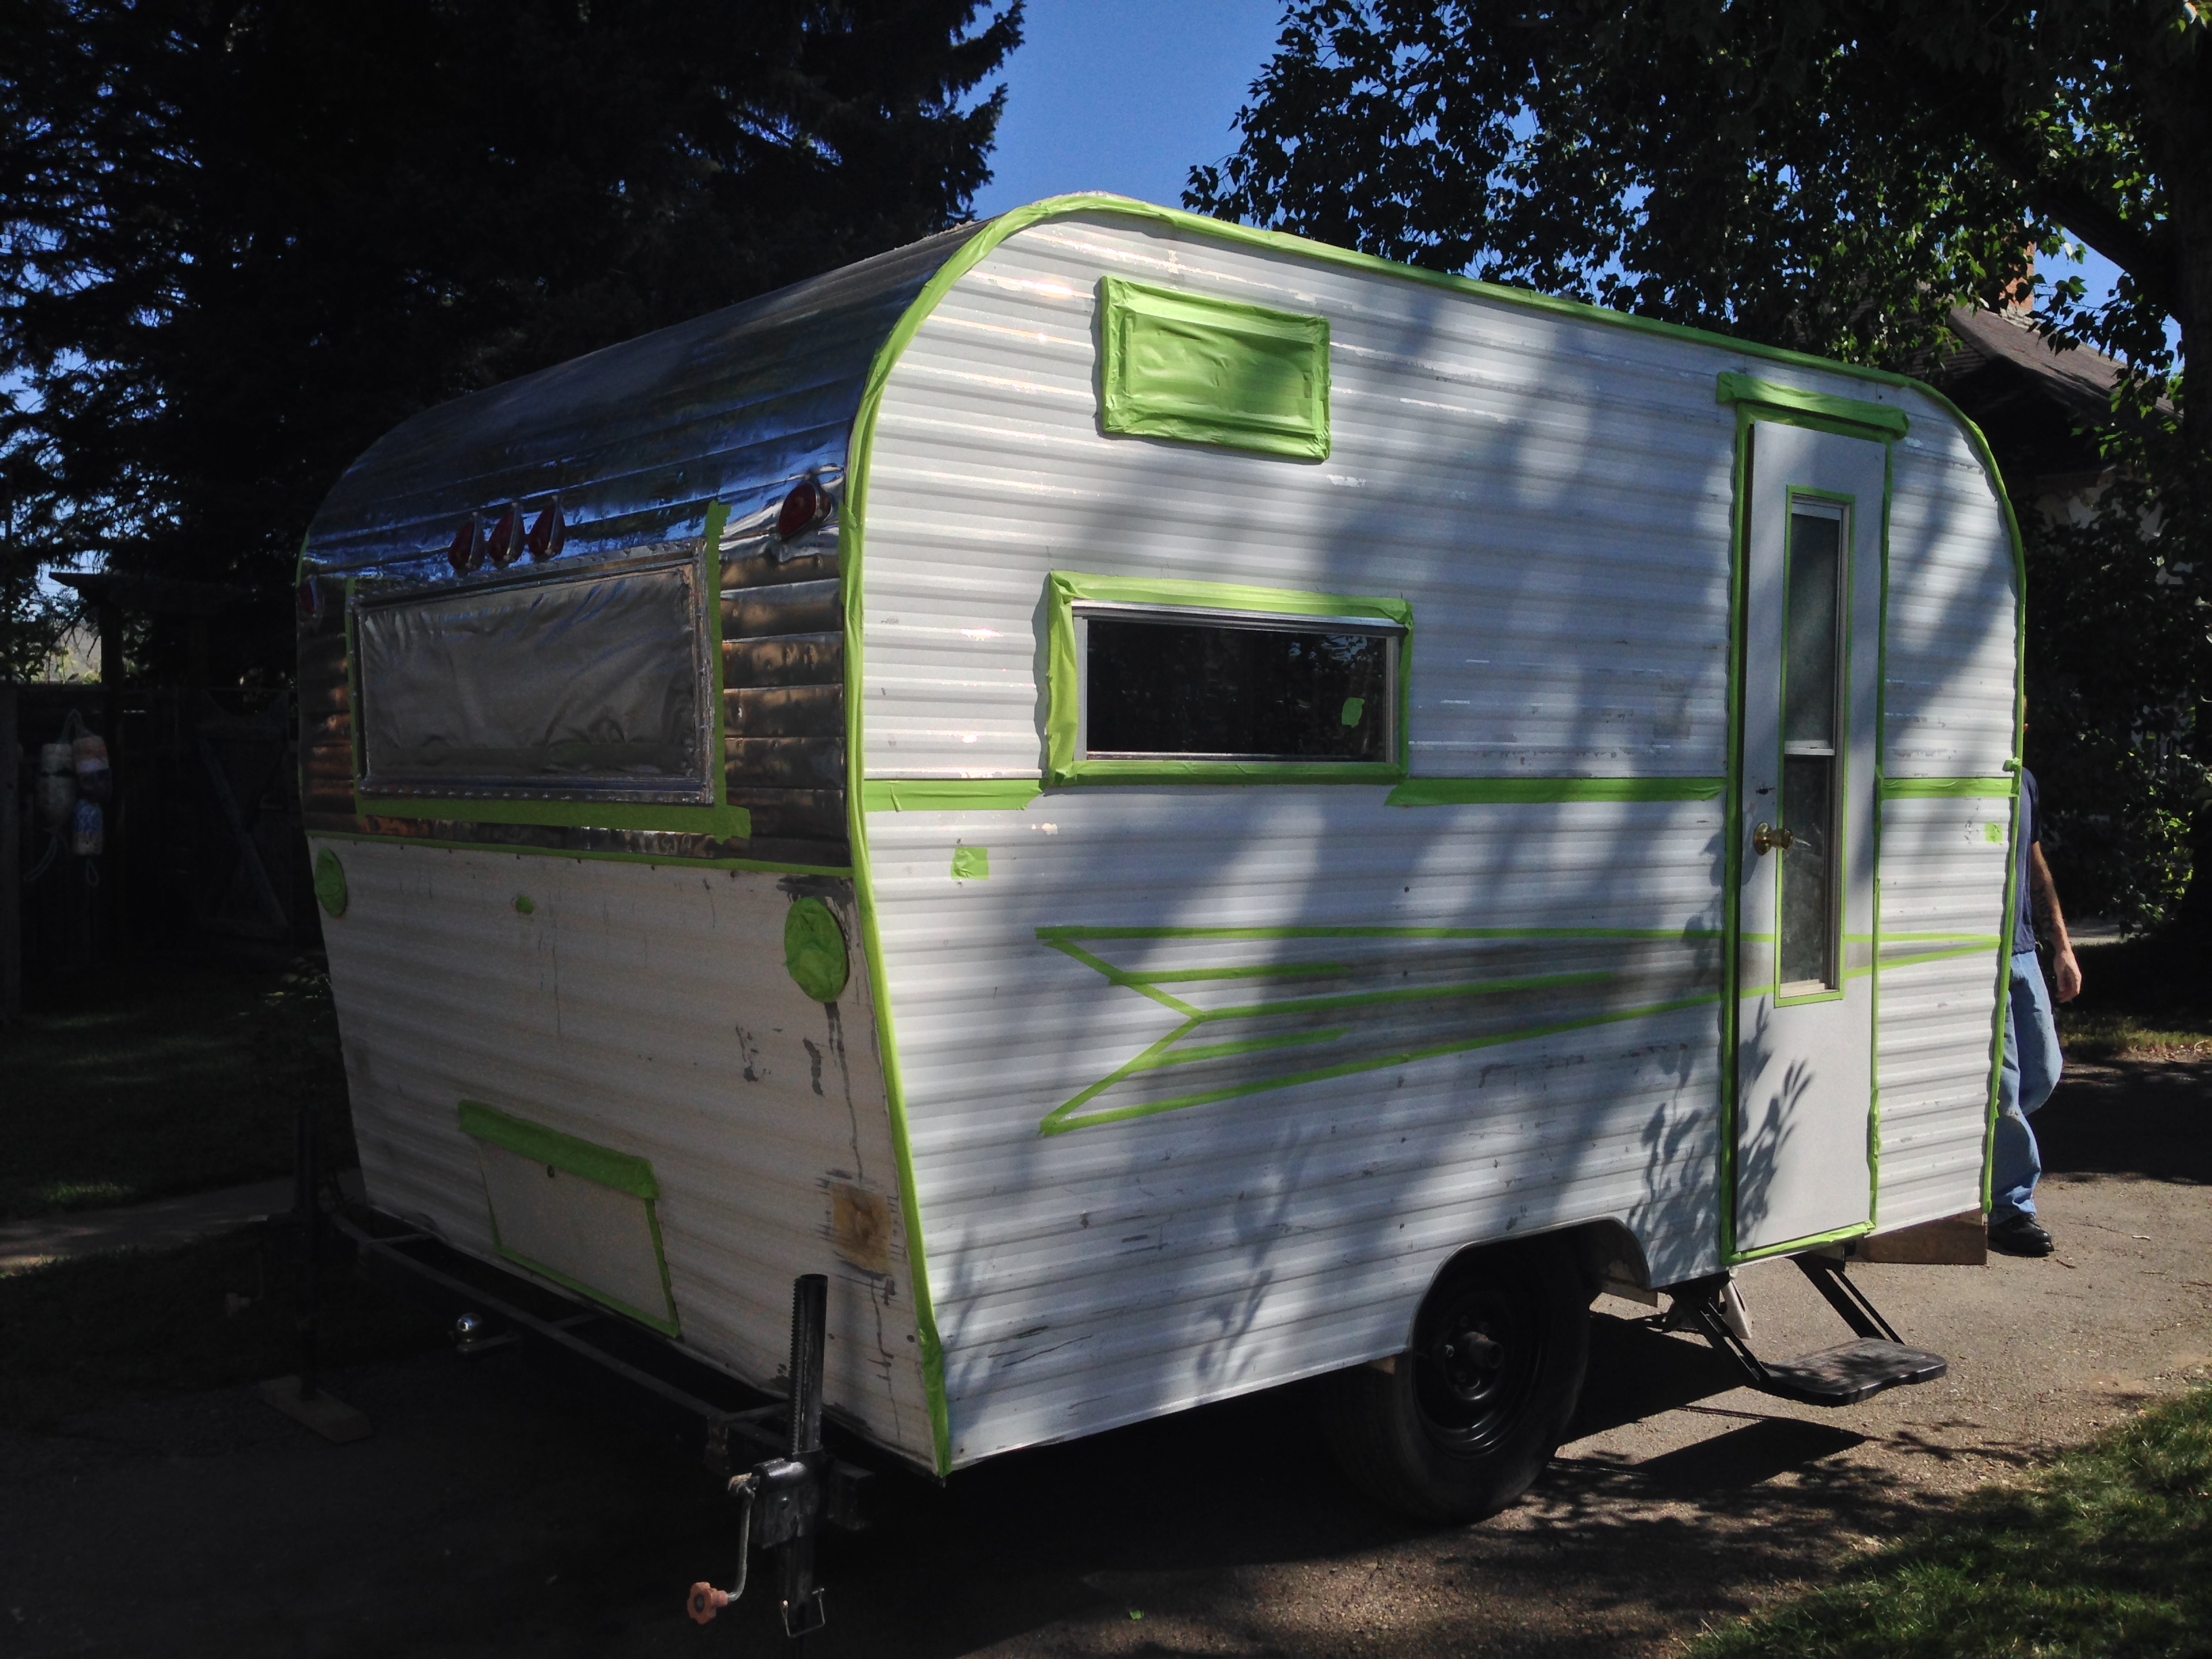
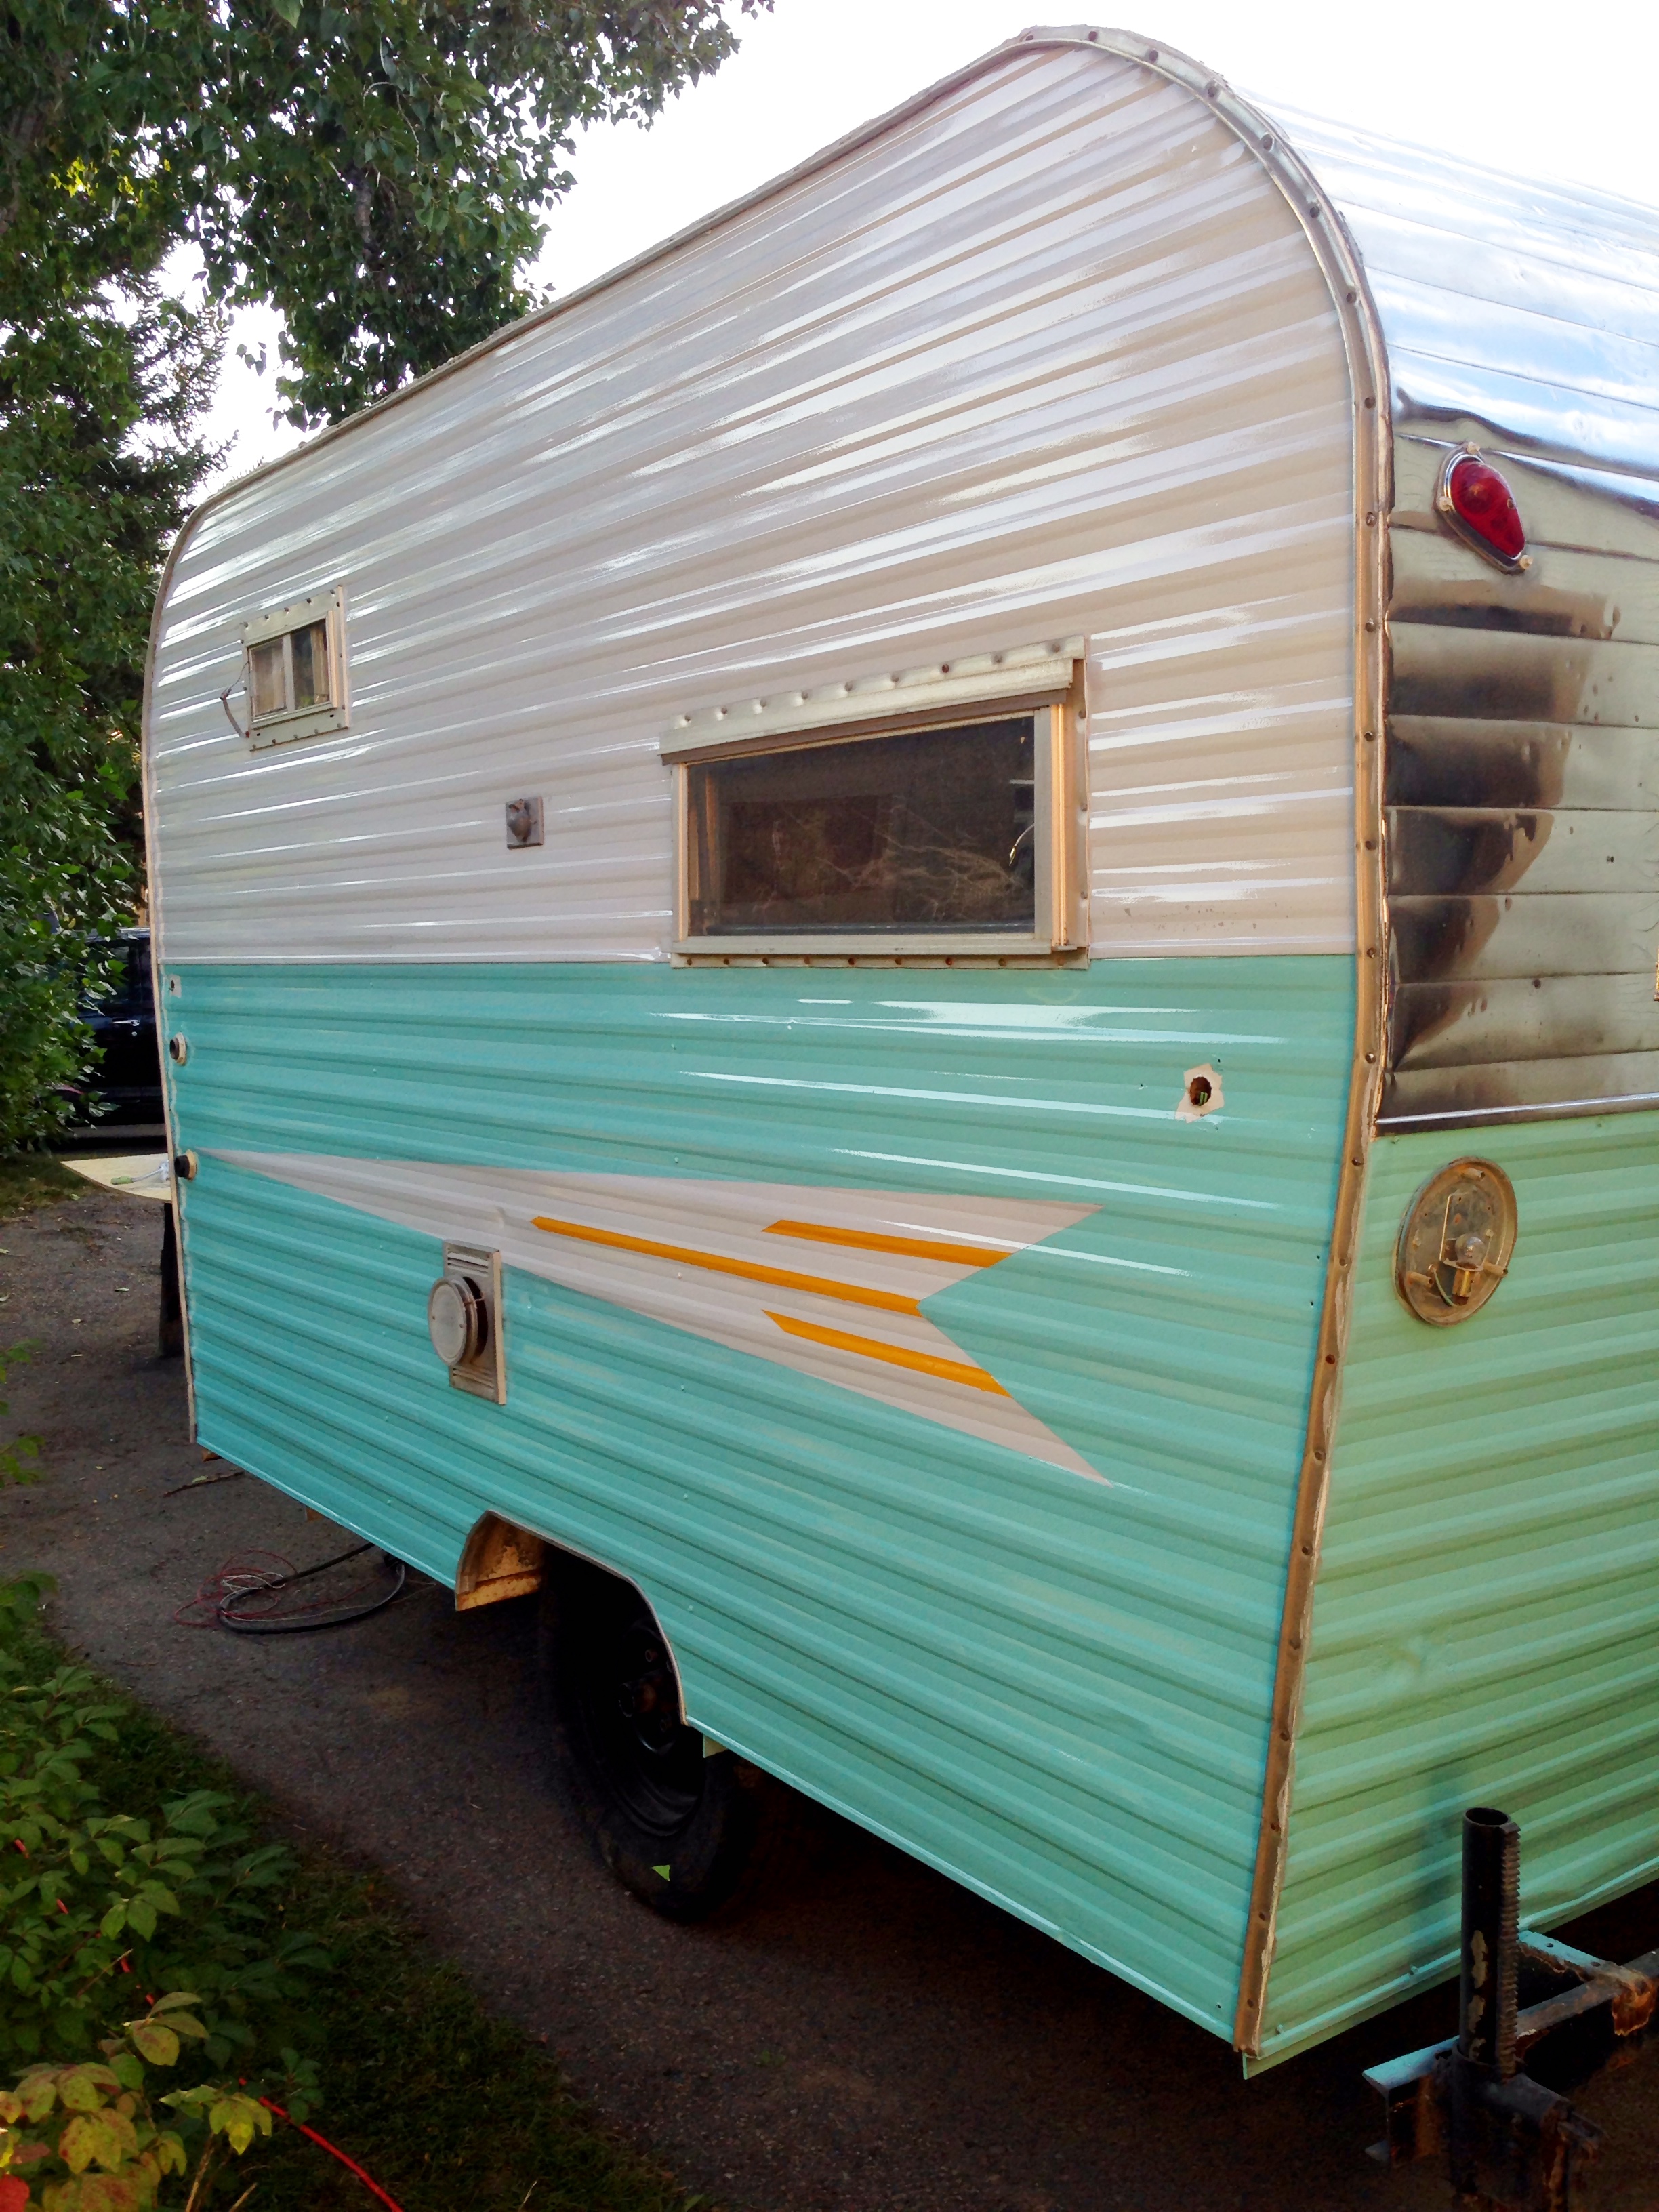
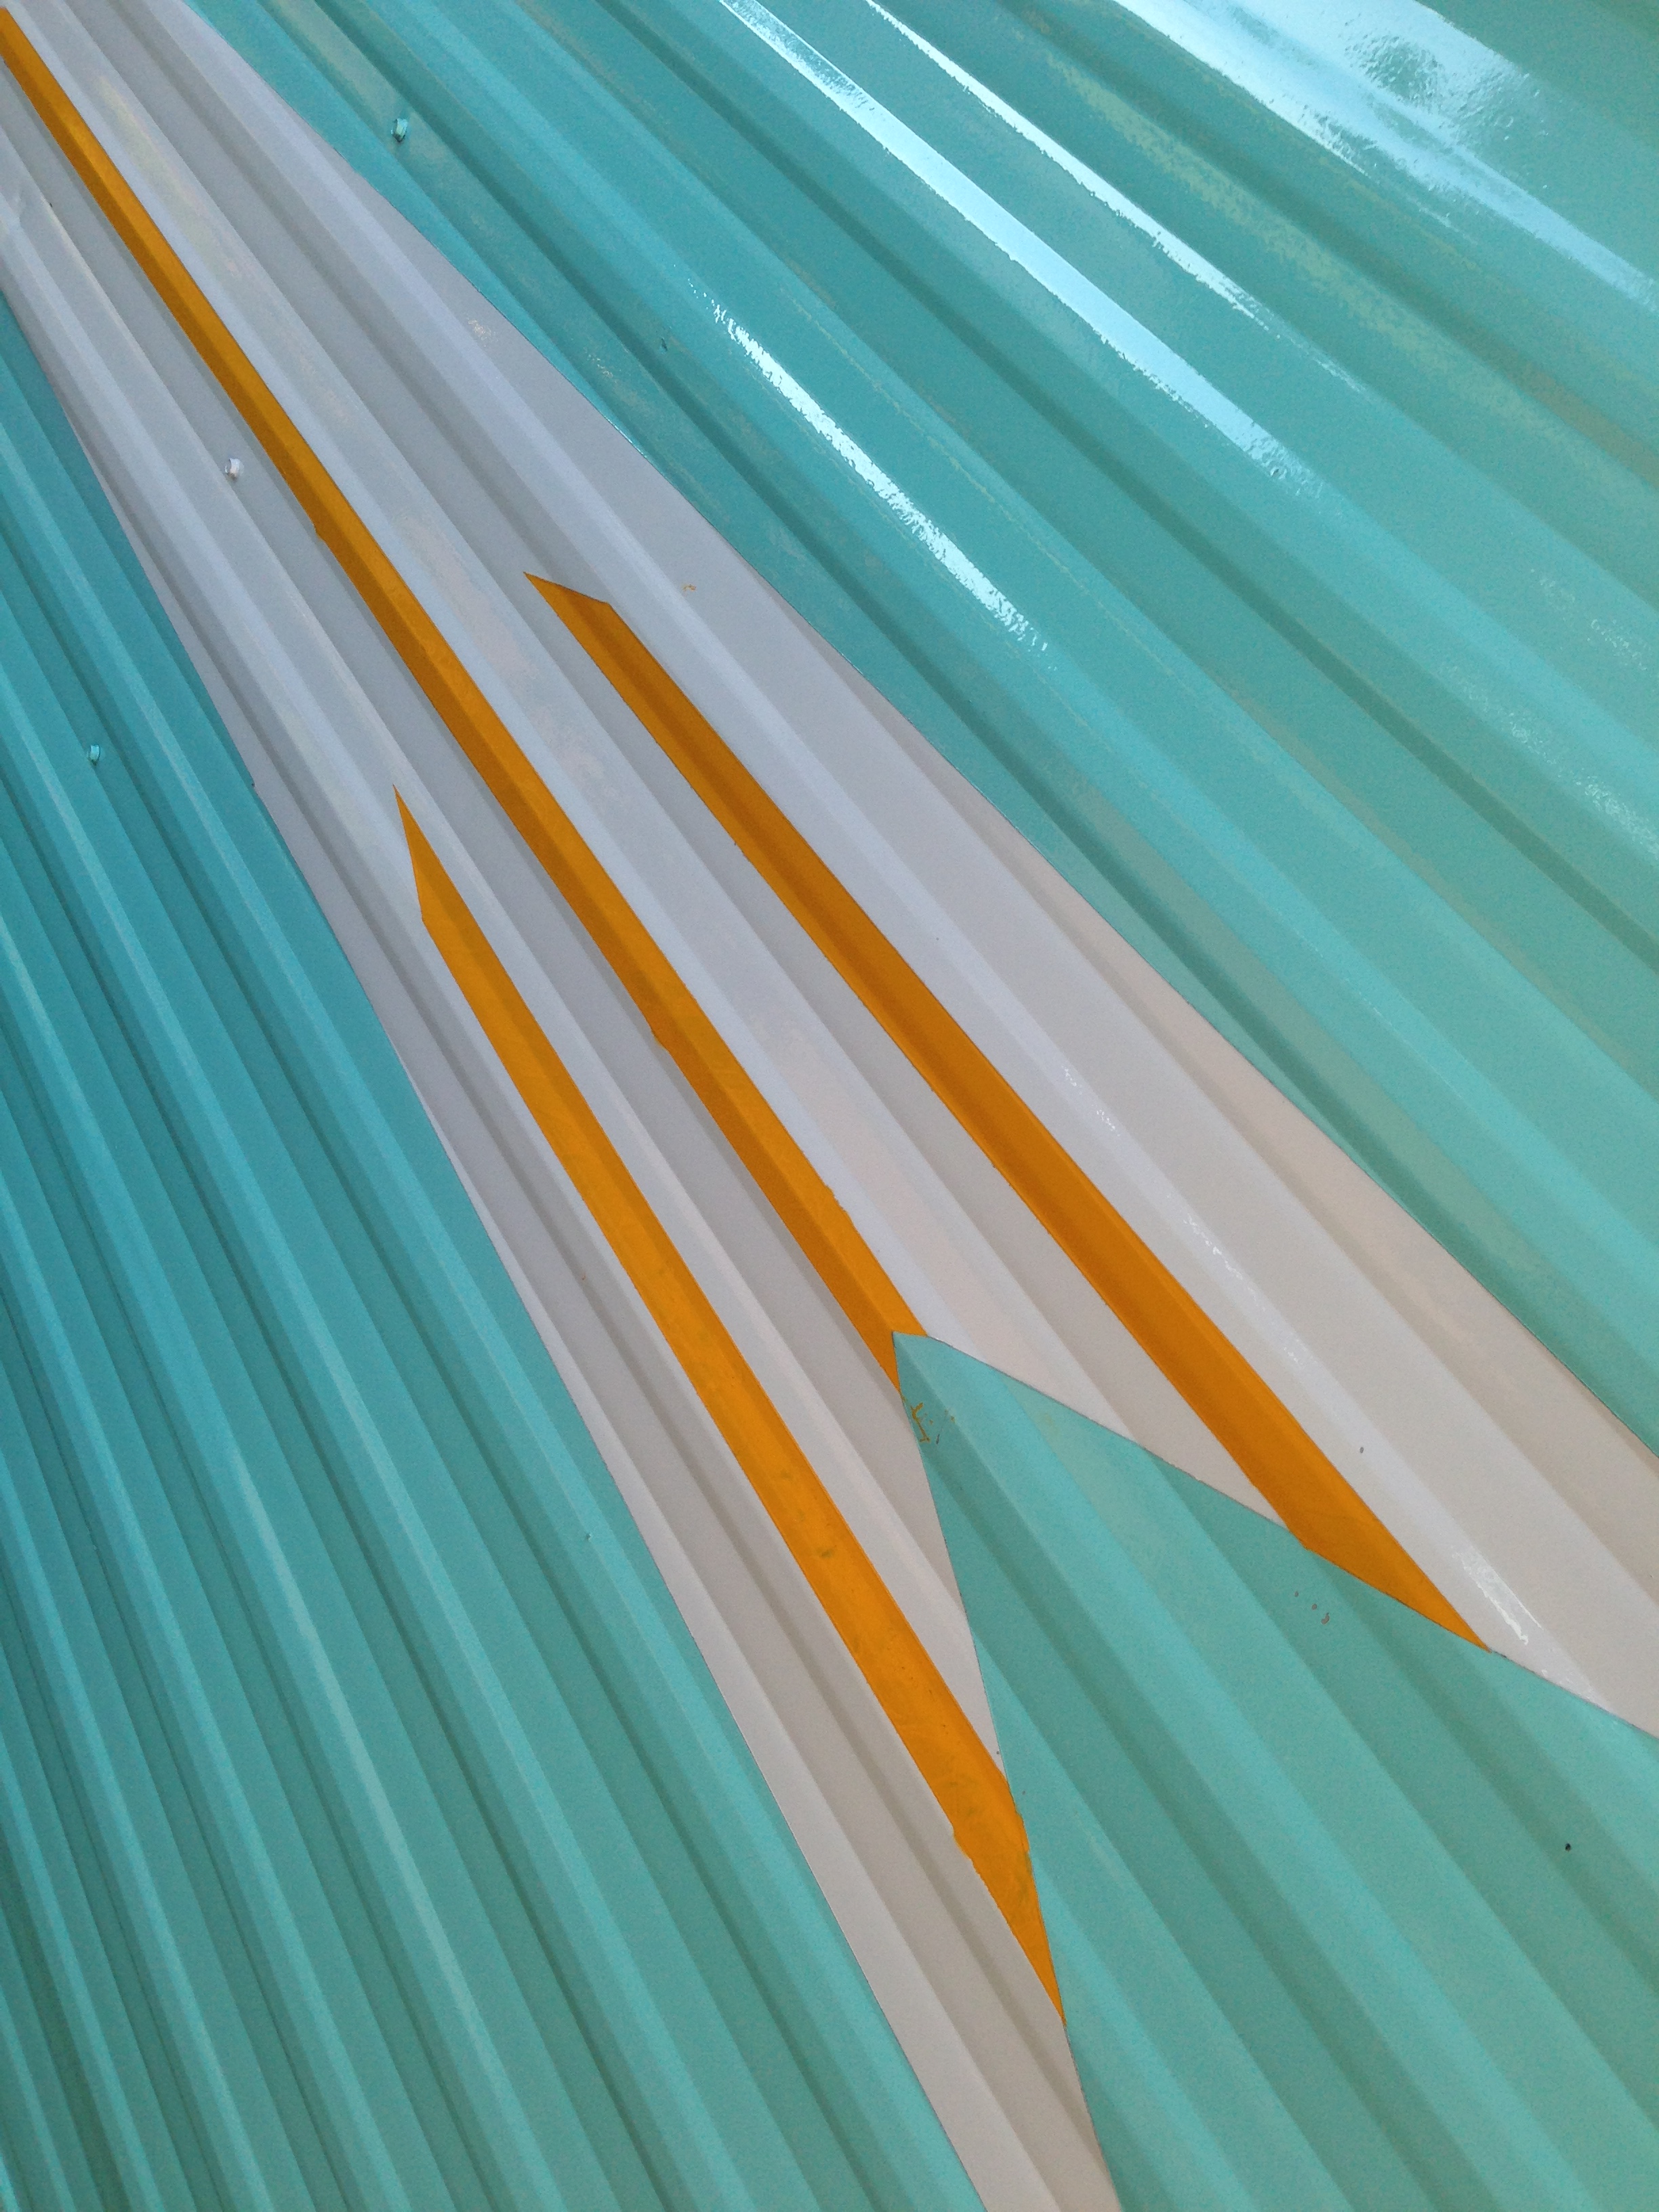
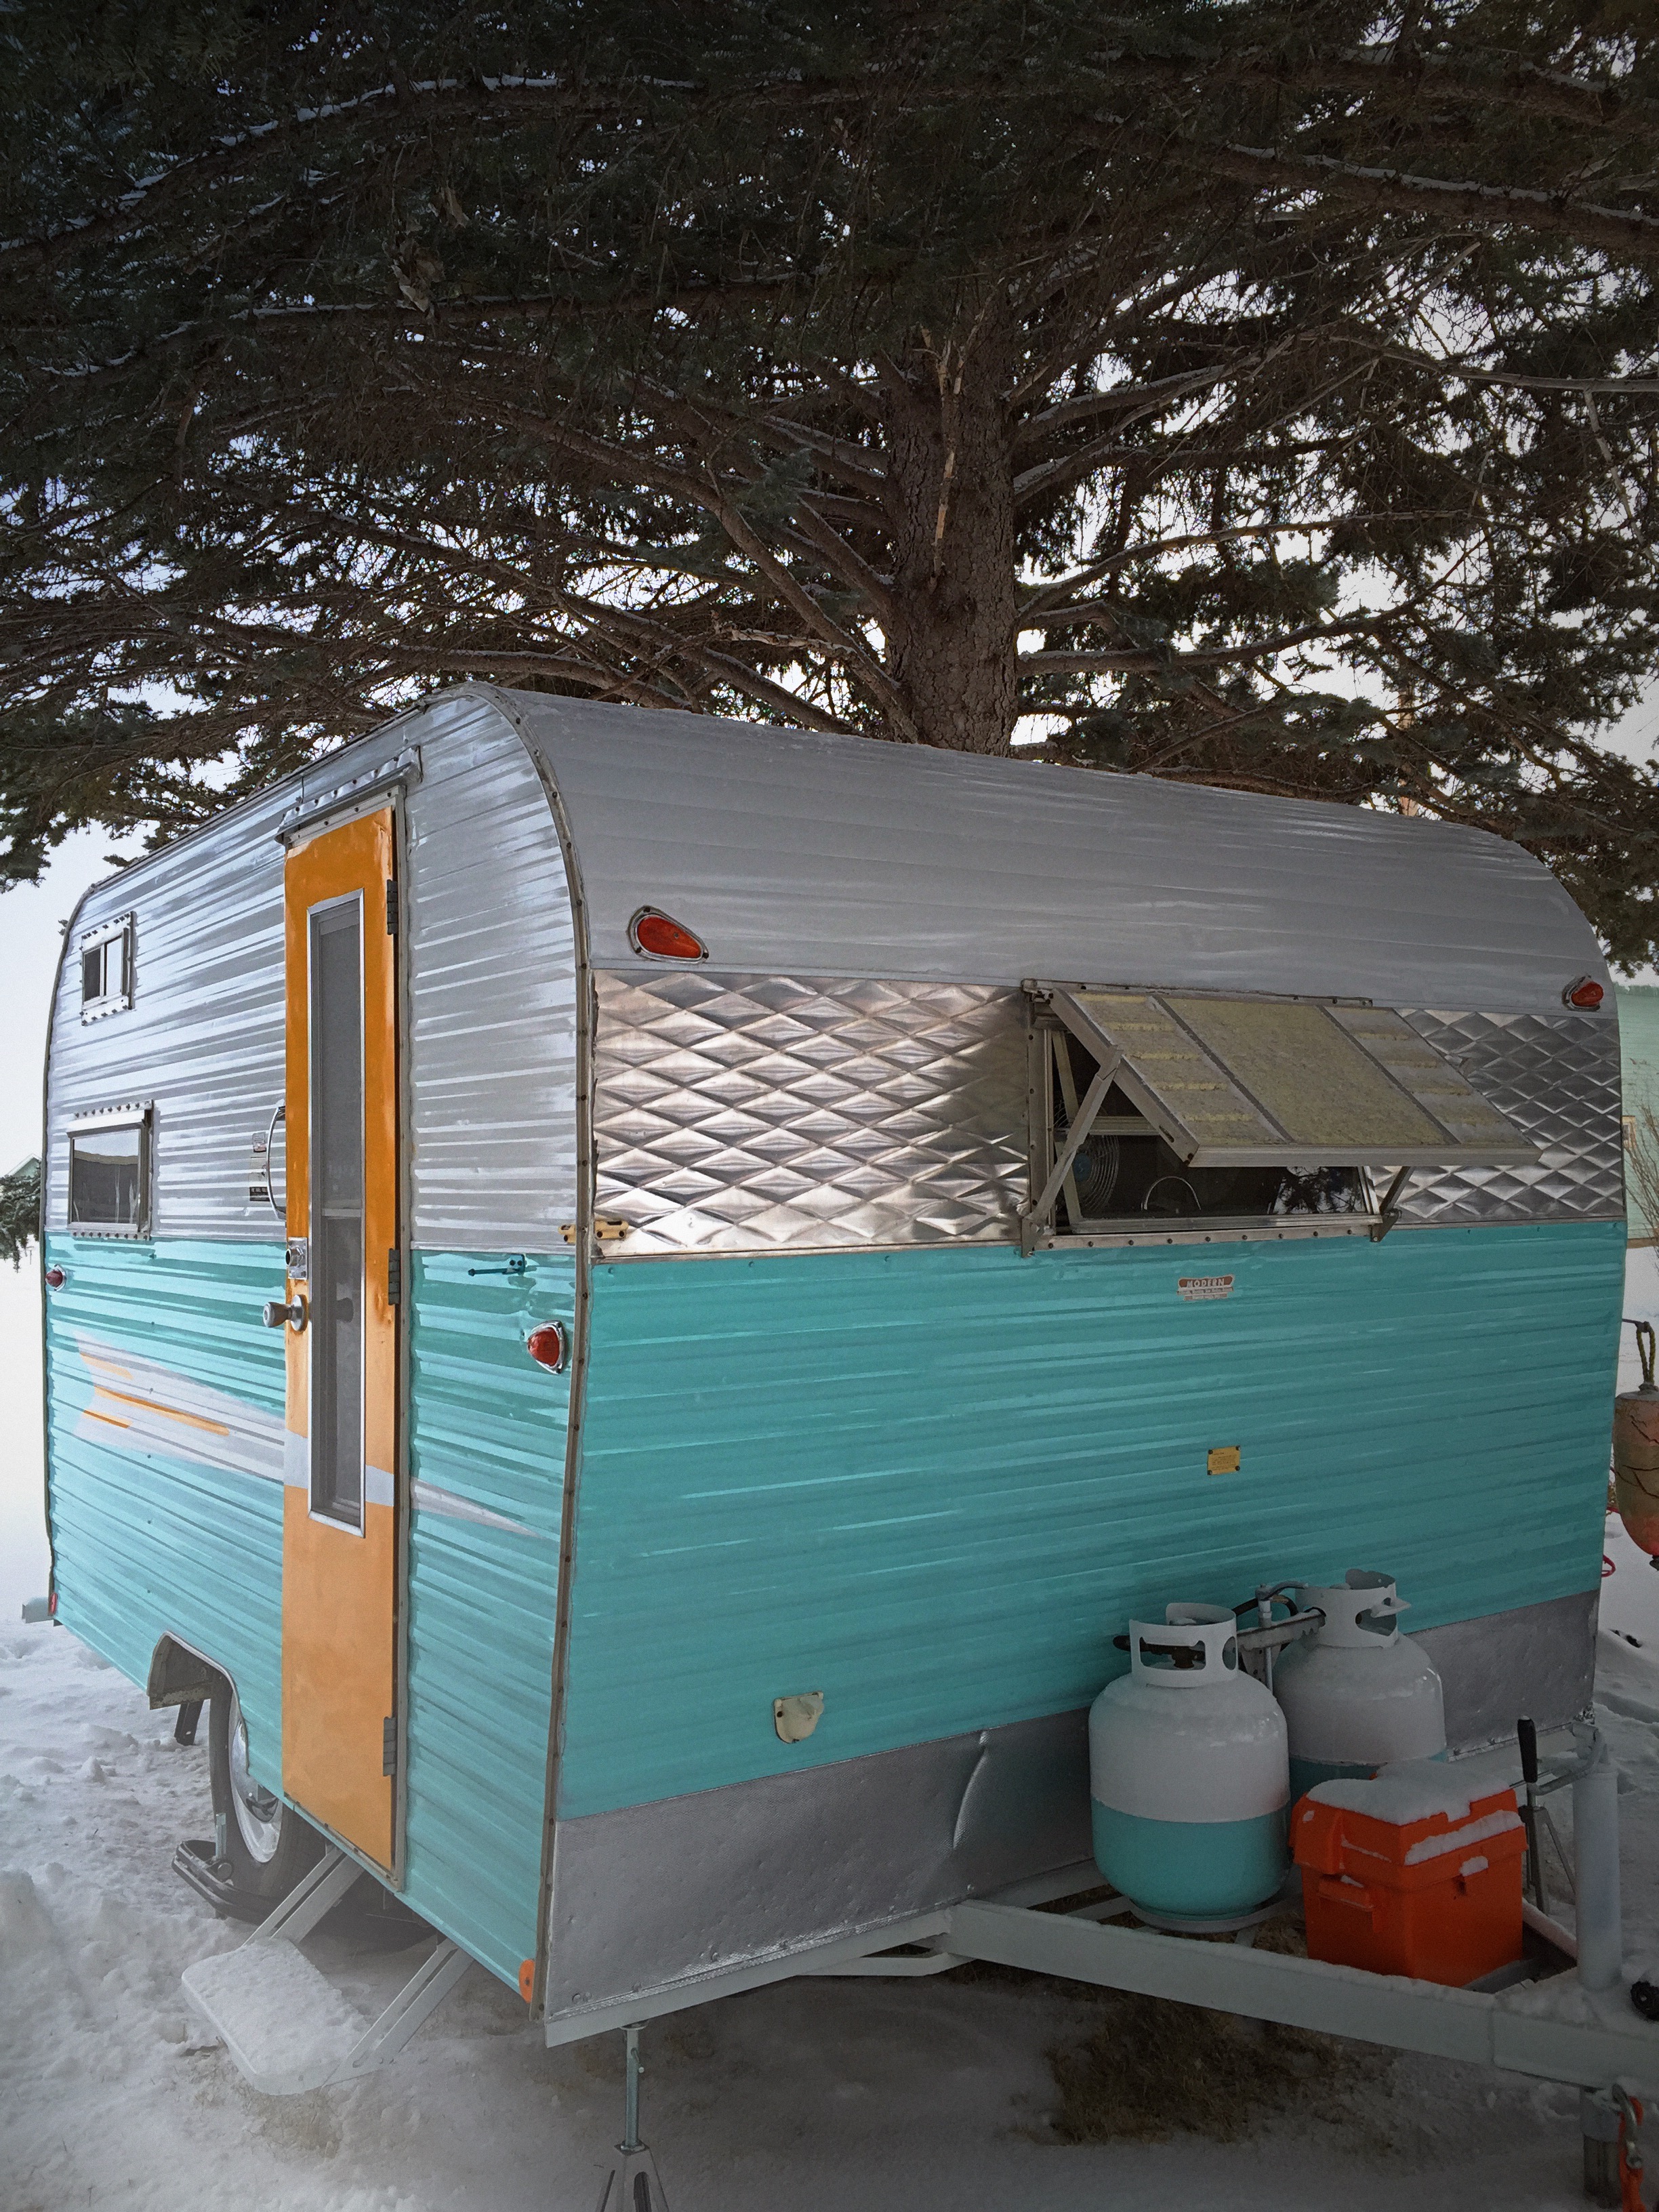
My plan for Myrtle was a two-tone concoction; turquoise on the bottom half and white on the top. The back side would receive the turquoise, but the back top half would be left as polished aluminum. The faintly visible original RoadRunner arrows on each side, which would fall in the turquoise section and across the door, would be white with orange accents, and the door would be orange. It was also very important to me that all of her original stickers be preserved. When I explained my design scheme for the exterior paint job, my husband informed me that I could have the joyous job of masking the trailer. It took longer to mask than to paint…
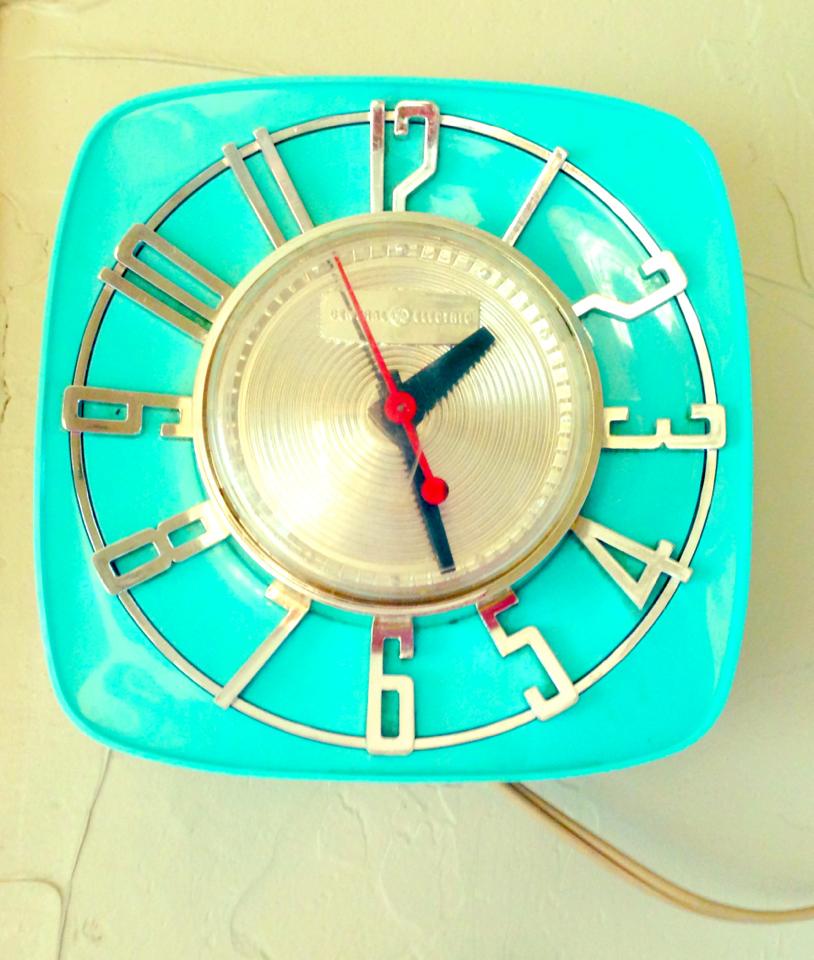
The 1960’s era clock that inspired Myrtle’s exterior paint color.
I have a mid-century clock which is that particular shade of turquoise that I associate with “60’s turquoise”. I brought home scads of aqua / turquoise paint sample cards from Home Depot until I found one that closely matched the clock -“Island Oasis” by Behr. For the orange accent color, I chose Atomic Tangerine, also by Behr. Then my husband ran the paint sample cards through the automotive paint matcher / scanner,… er, thing-a-ma-jig, that he has at work, and it produced auto paint color formulas based on the sample cards, which he then used to mix the paint. For the white, we just went with a cool, crisp, arctic white auto paint.
Before masking or priming could begin, my husband explained that we had to lightly sand every square inch of Myrtle, followed by a complete wipe down with a metal prepping solvent. Well, that just took forever, didn’t it? Throughout the process, I wondered aloud why we couldn’t just paint her with, say, Annie Sloan Chalk Paint (ASCP). No prep, no sanding –just paint and wax. Apparently, ASCP is not on the automotive approved list, though, as my grumblings were dismissed for lack of merit.

Pre-masking tape
My color scheme required a quadruple masking procedure. First, we pre-masked the entire trailer with automotive painter’s tape (windows, trim, polished aluminum sections, et cetera), then we masked the arrow shape out with tape, trying to follow the remnants of the paint from the original arrow. The arrow accents were masked out completely, so only the portion of the arrows getting white paint were left uncovered. My husband covered Myrtle’s original stickers with a clear, adhesive masking sheet, and cut around them precisely, leaving only the stickers covered.
It was not as easy to follow the faint arrow paint lines with the tape as I thought it would be…
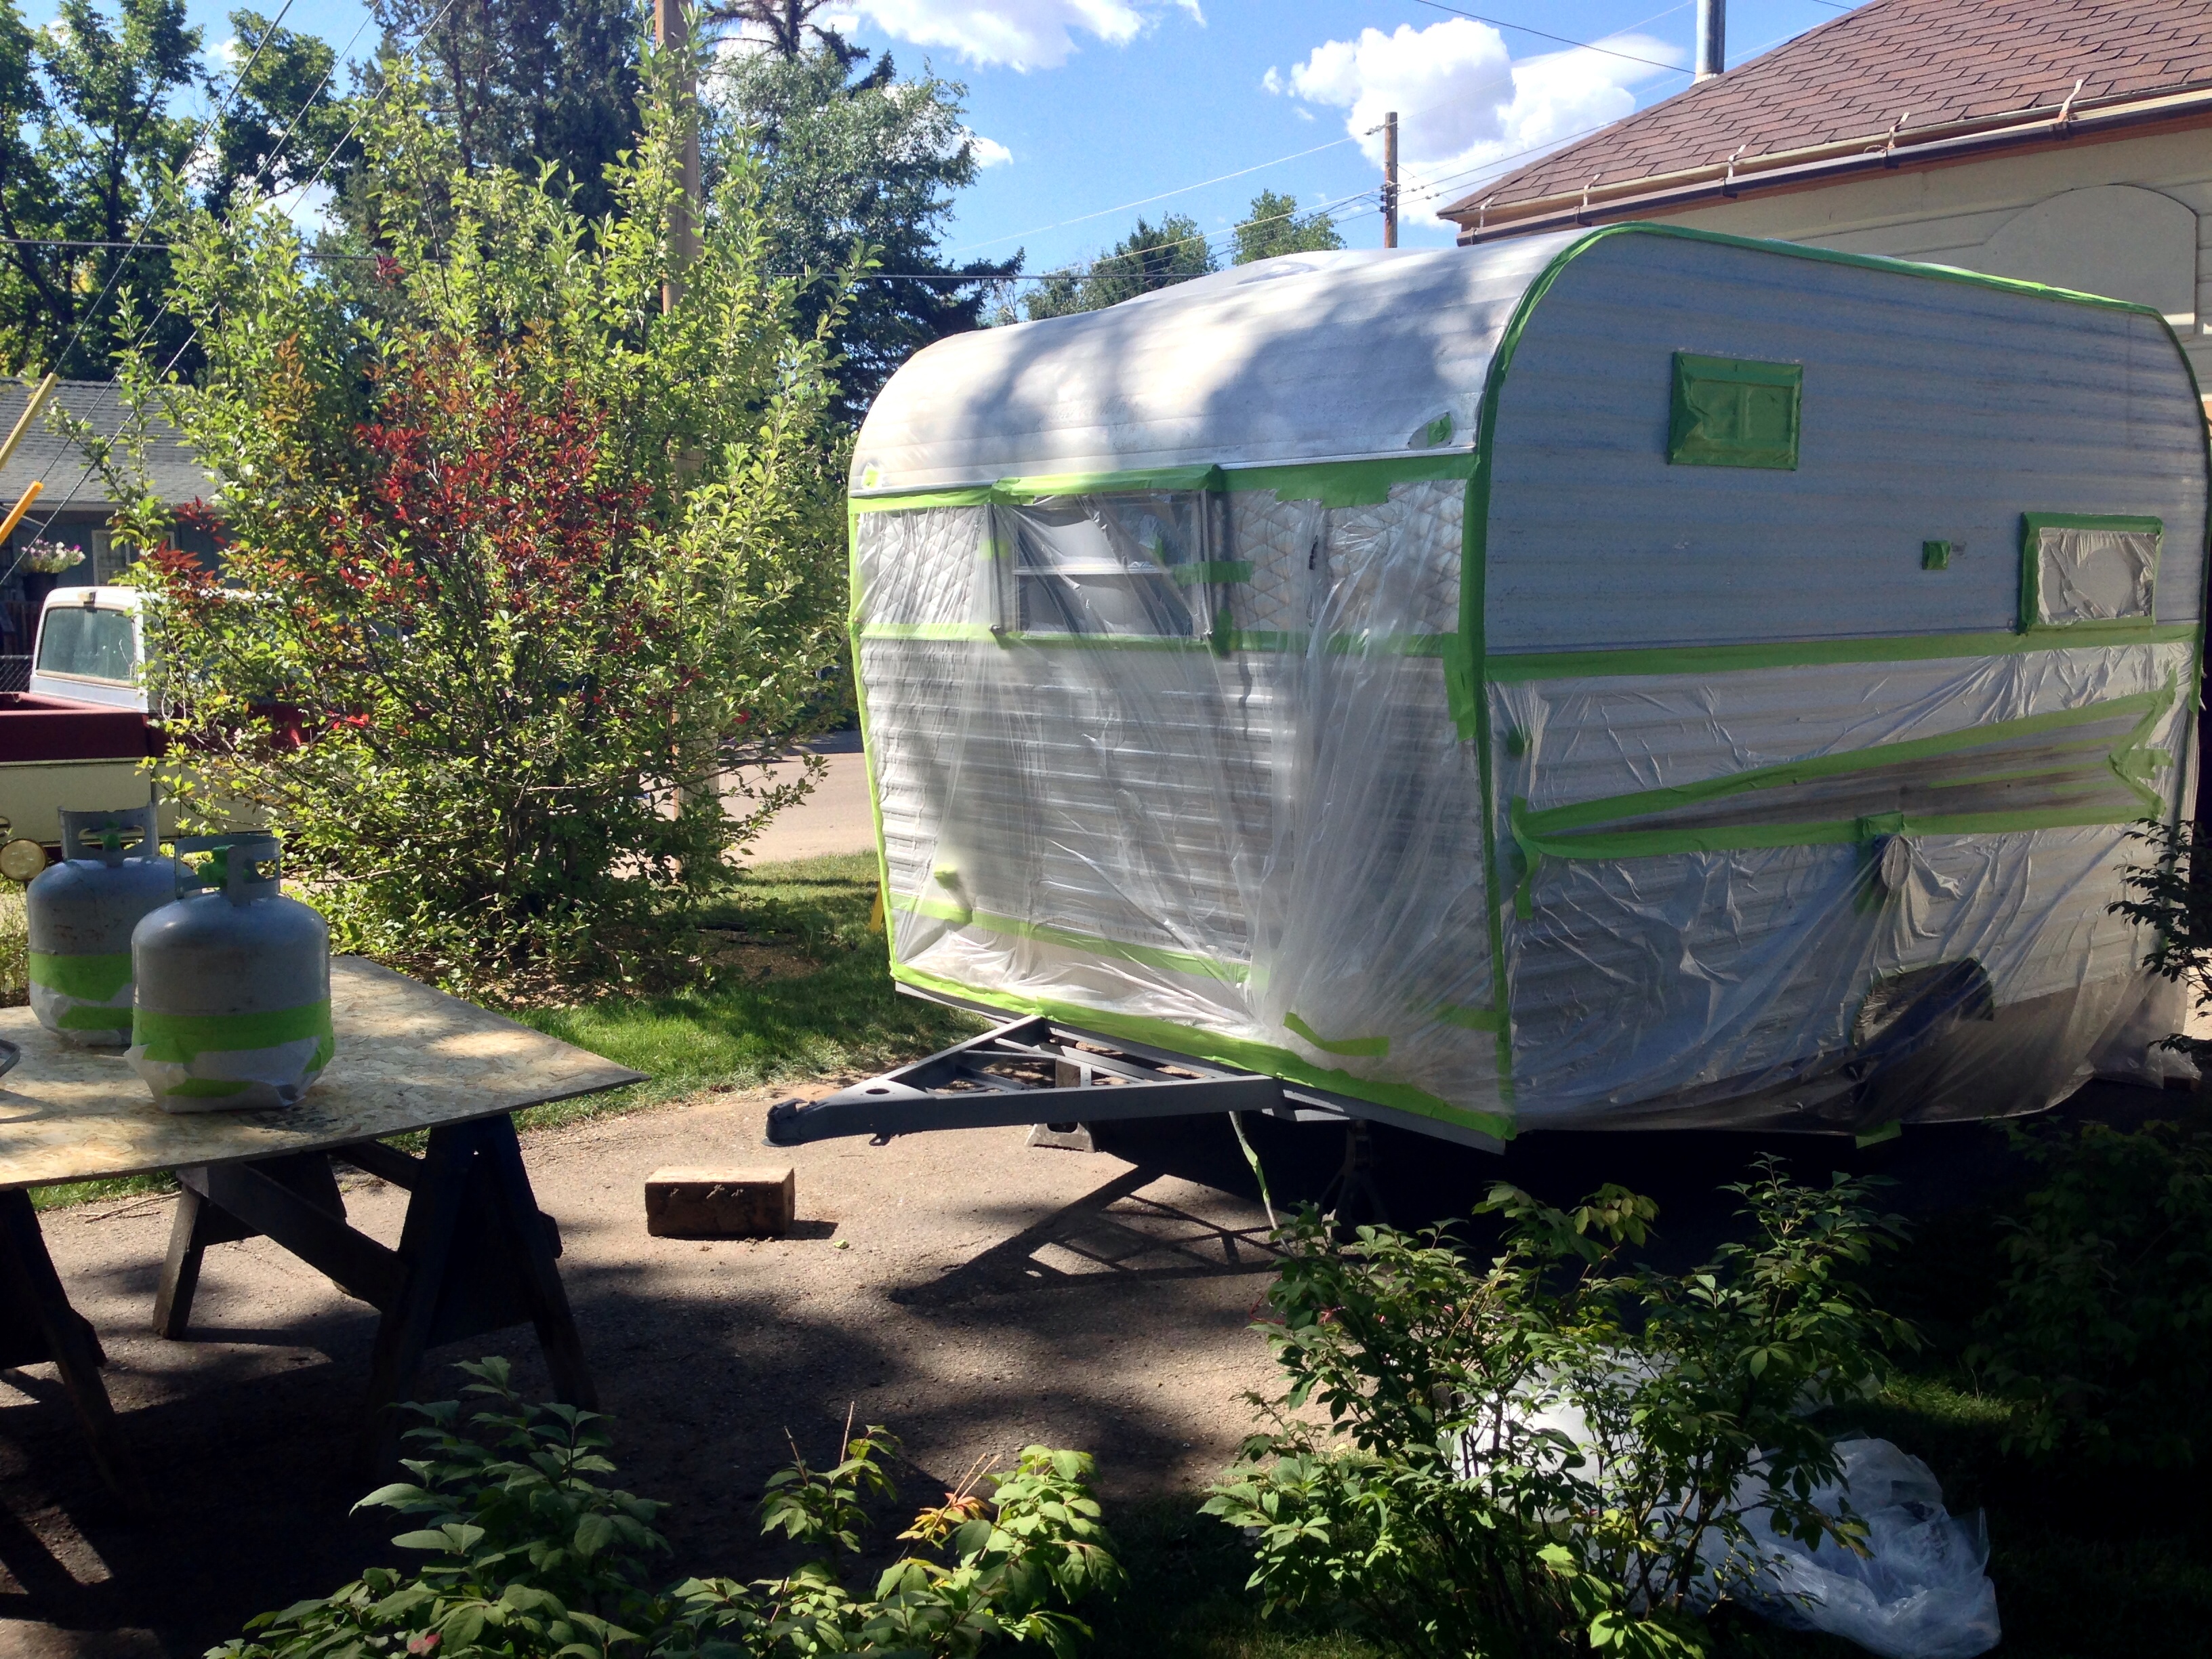
 Next, we masked the entire trailer with tape and sheets of auto painting plastic, only leaving the sections that would receive white paint exposed.
  At that point, my husband donned his paint mask and sprayed the trailer with auto primer, followed by the white paint.
1969 RoadRunner and propane tanks, masked for the white paint
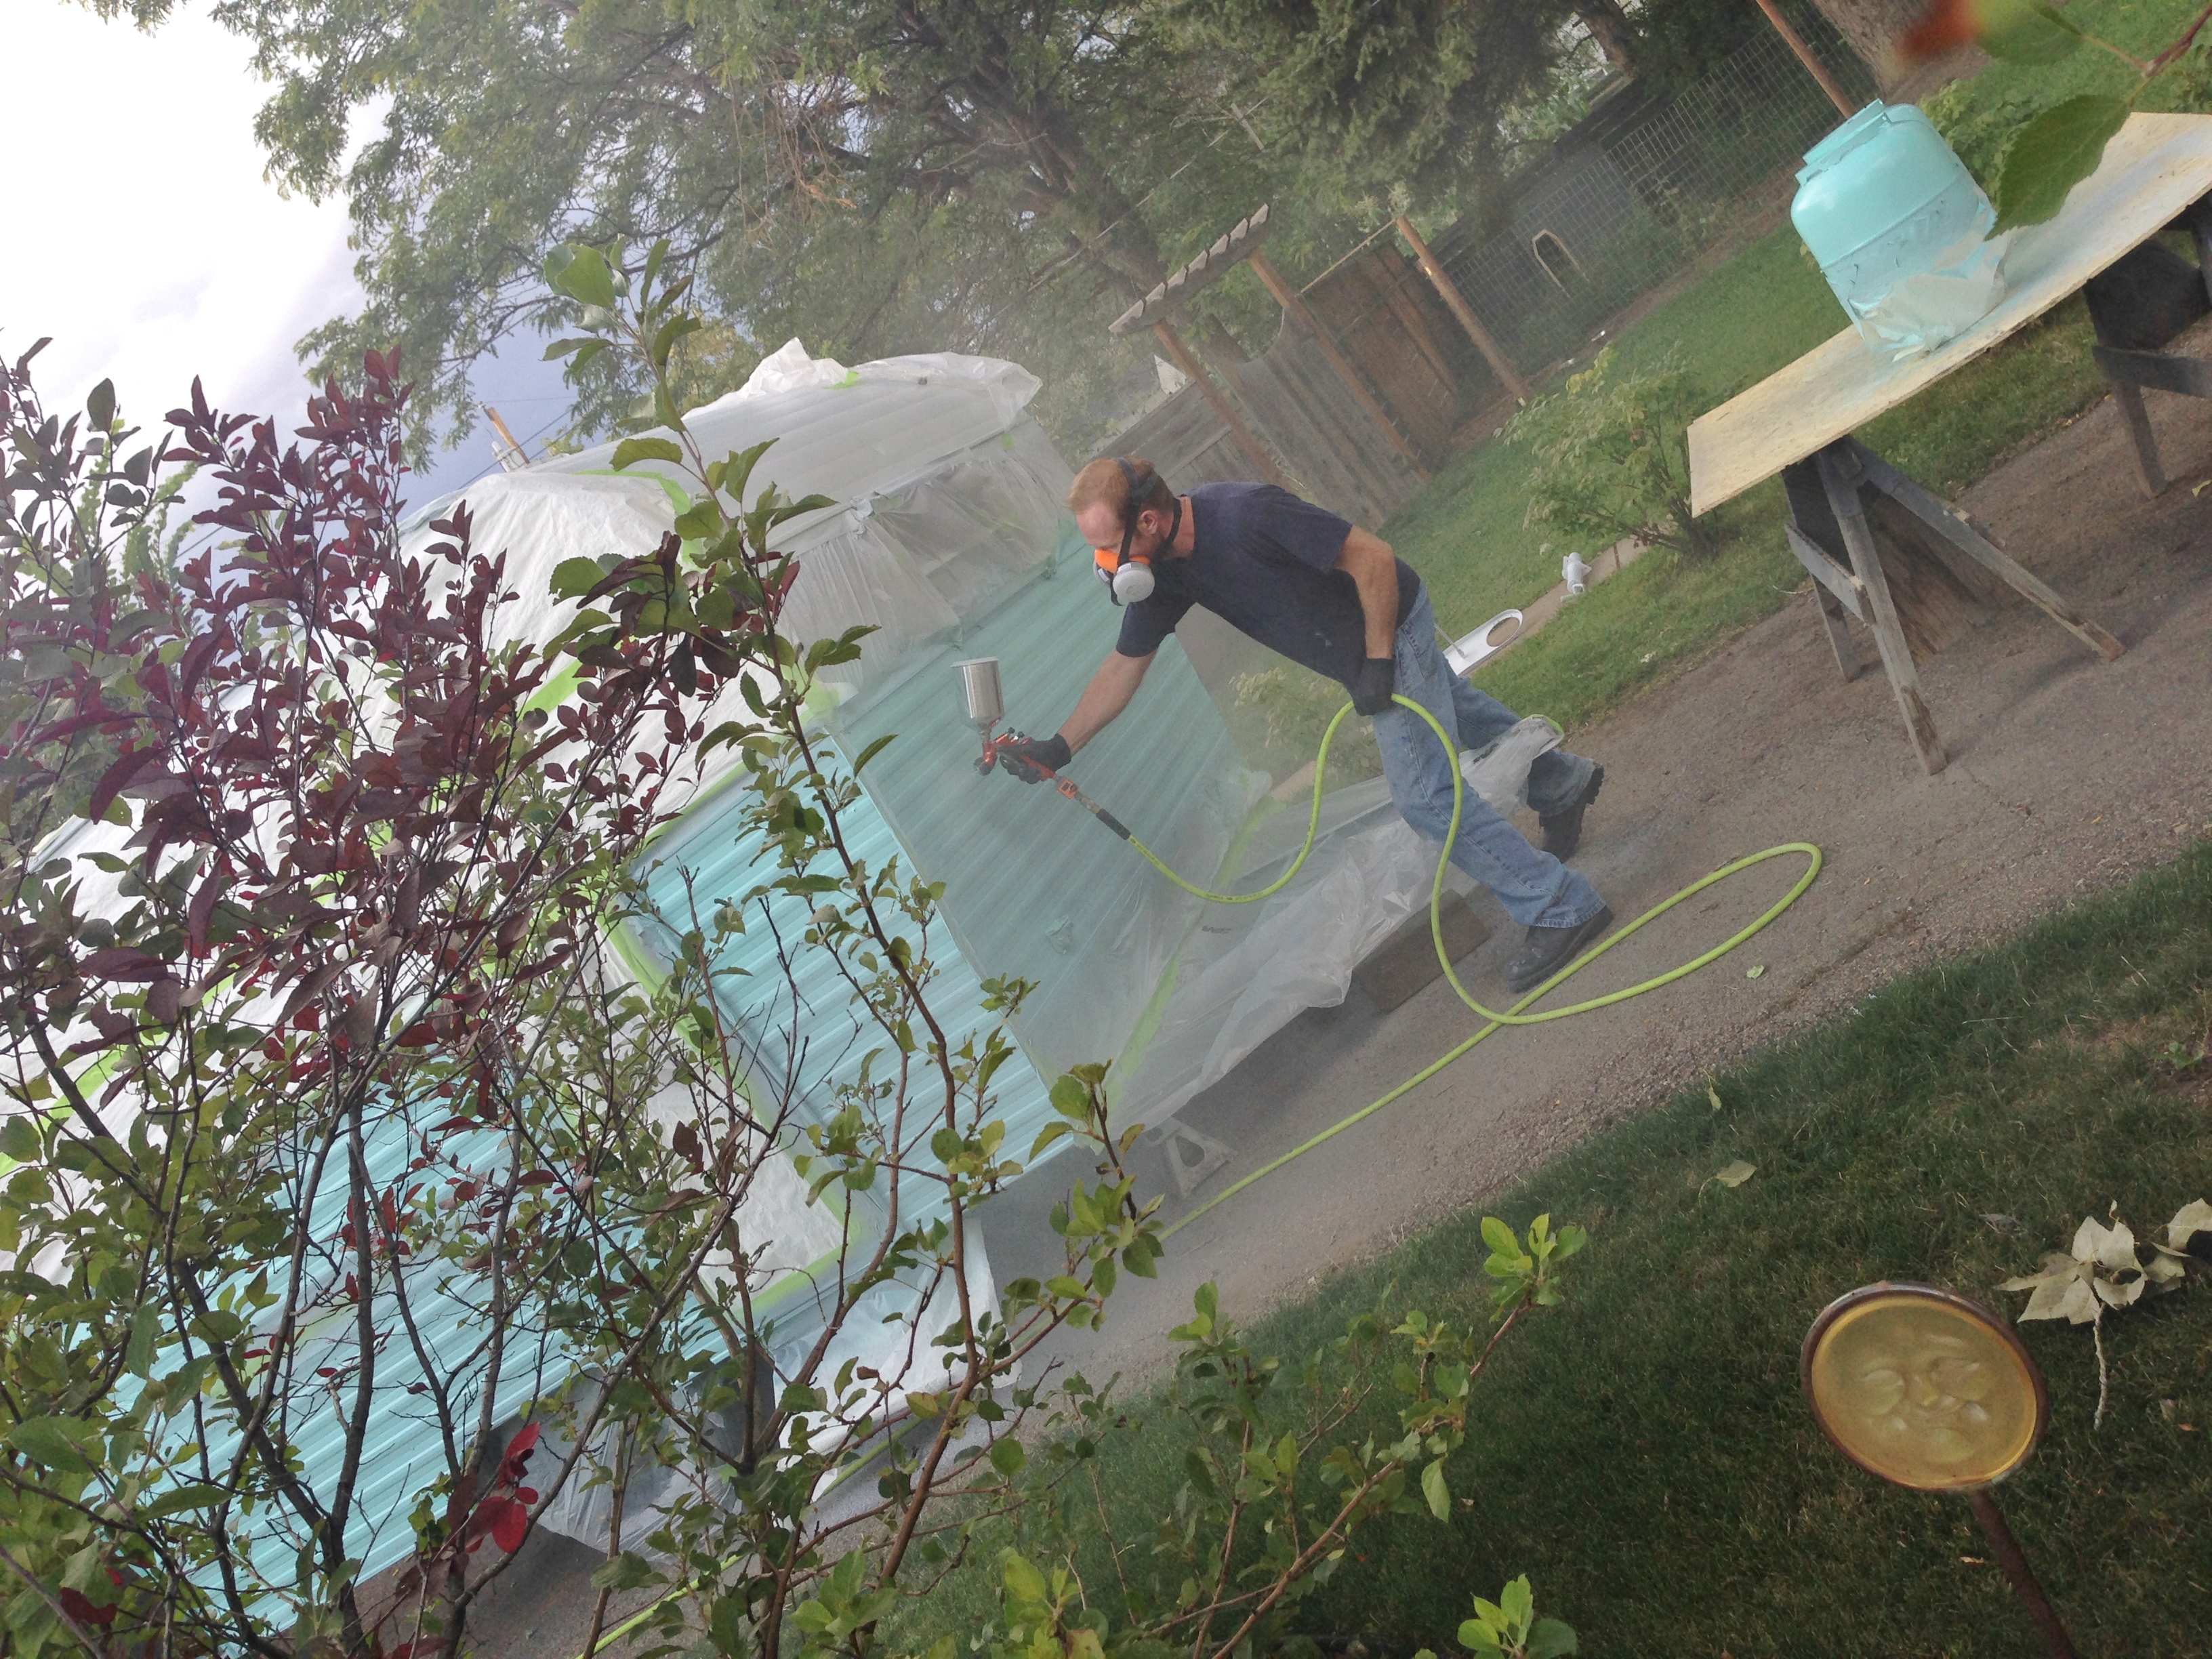
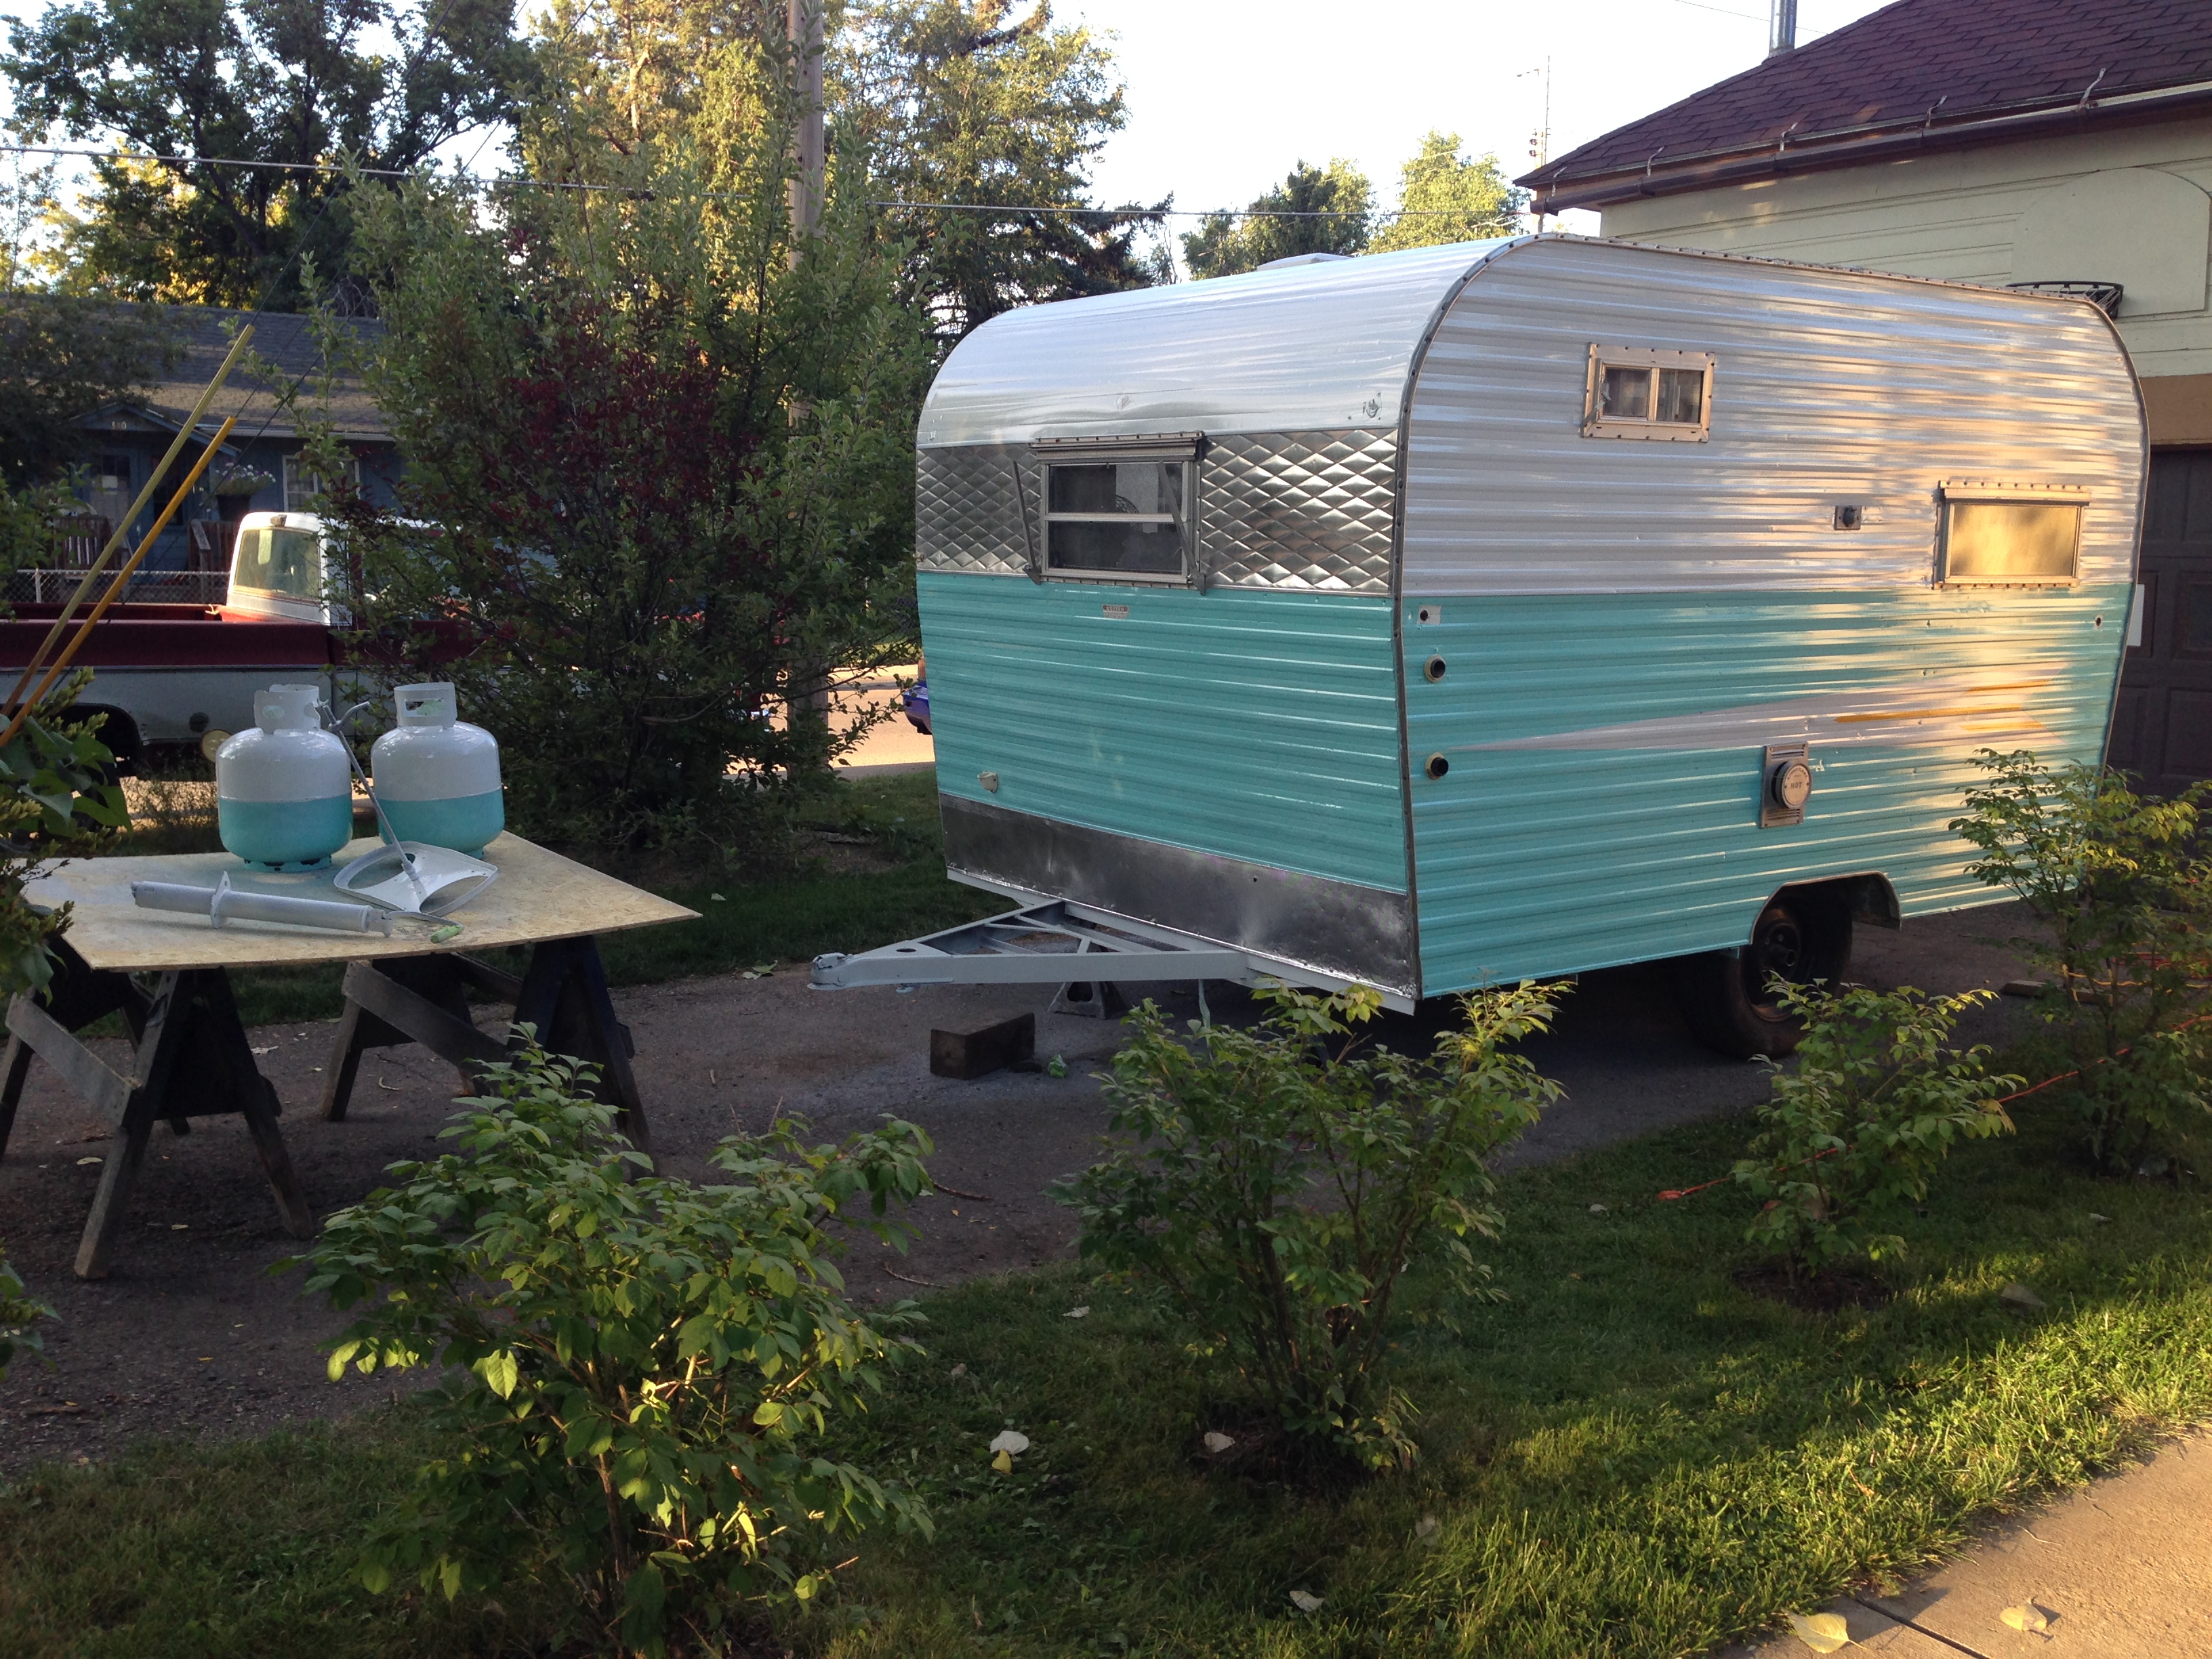
Once the white was primed, painted and dried, we re-masked to cover all the white sections and expose the panels that were getting the turquoise. The arrow was masked off completely. Repeat of the primer, then turquoise paint. In between coats drying, the masked propane tanks also received a nice new paint job of white with turquoise banding.


After the turquoise sections dried, we unmasked the arrow and re-masked to cover everything but the arrow accents. We un-masked the door, and re-masked the trailer around it, then the door and arrow accents received primer followed by the Atomic Tangerine paint. Then, finally, we un-masked everything except for the pre-masked trim & window tape, removed the adhesive masking from Myrtle’s original stickers, and my husband clear-coated the entire trailer.

RoadRunner FINE TRAVEL TRAILERS

Myrtle’s original stickers are now clear-coated for protection from the elements 🙂
At some point during this process, it began to randomly rain out of a blue, sunny sky. I think it was right in between the white and the turquoise painting. Luckily, auto paint dries extraordinarily fast, and no real damage was done to the paint job by the finicky weather.

The Reveal!!


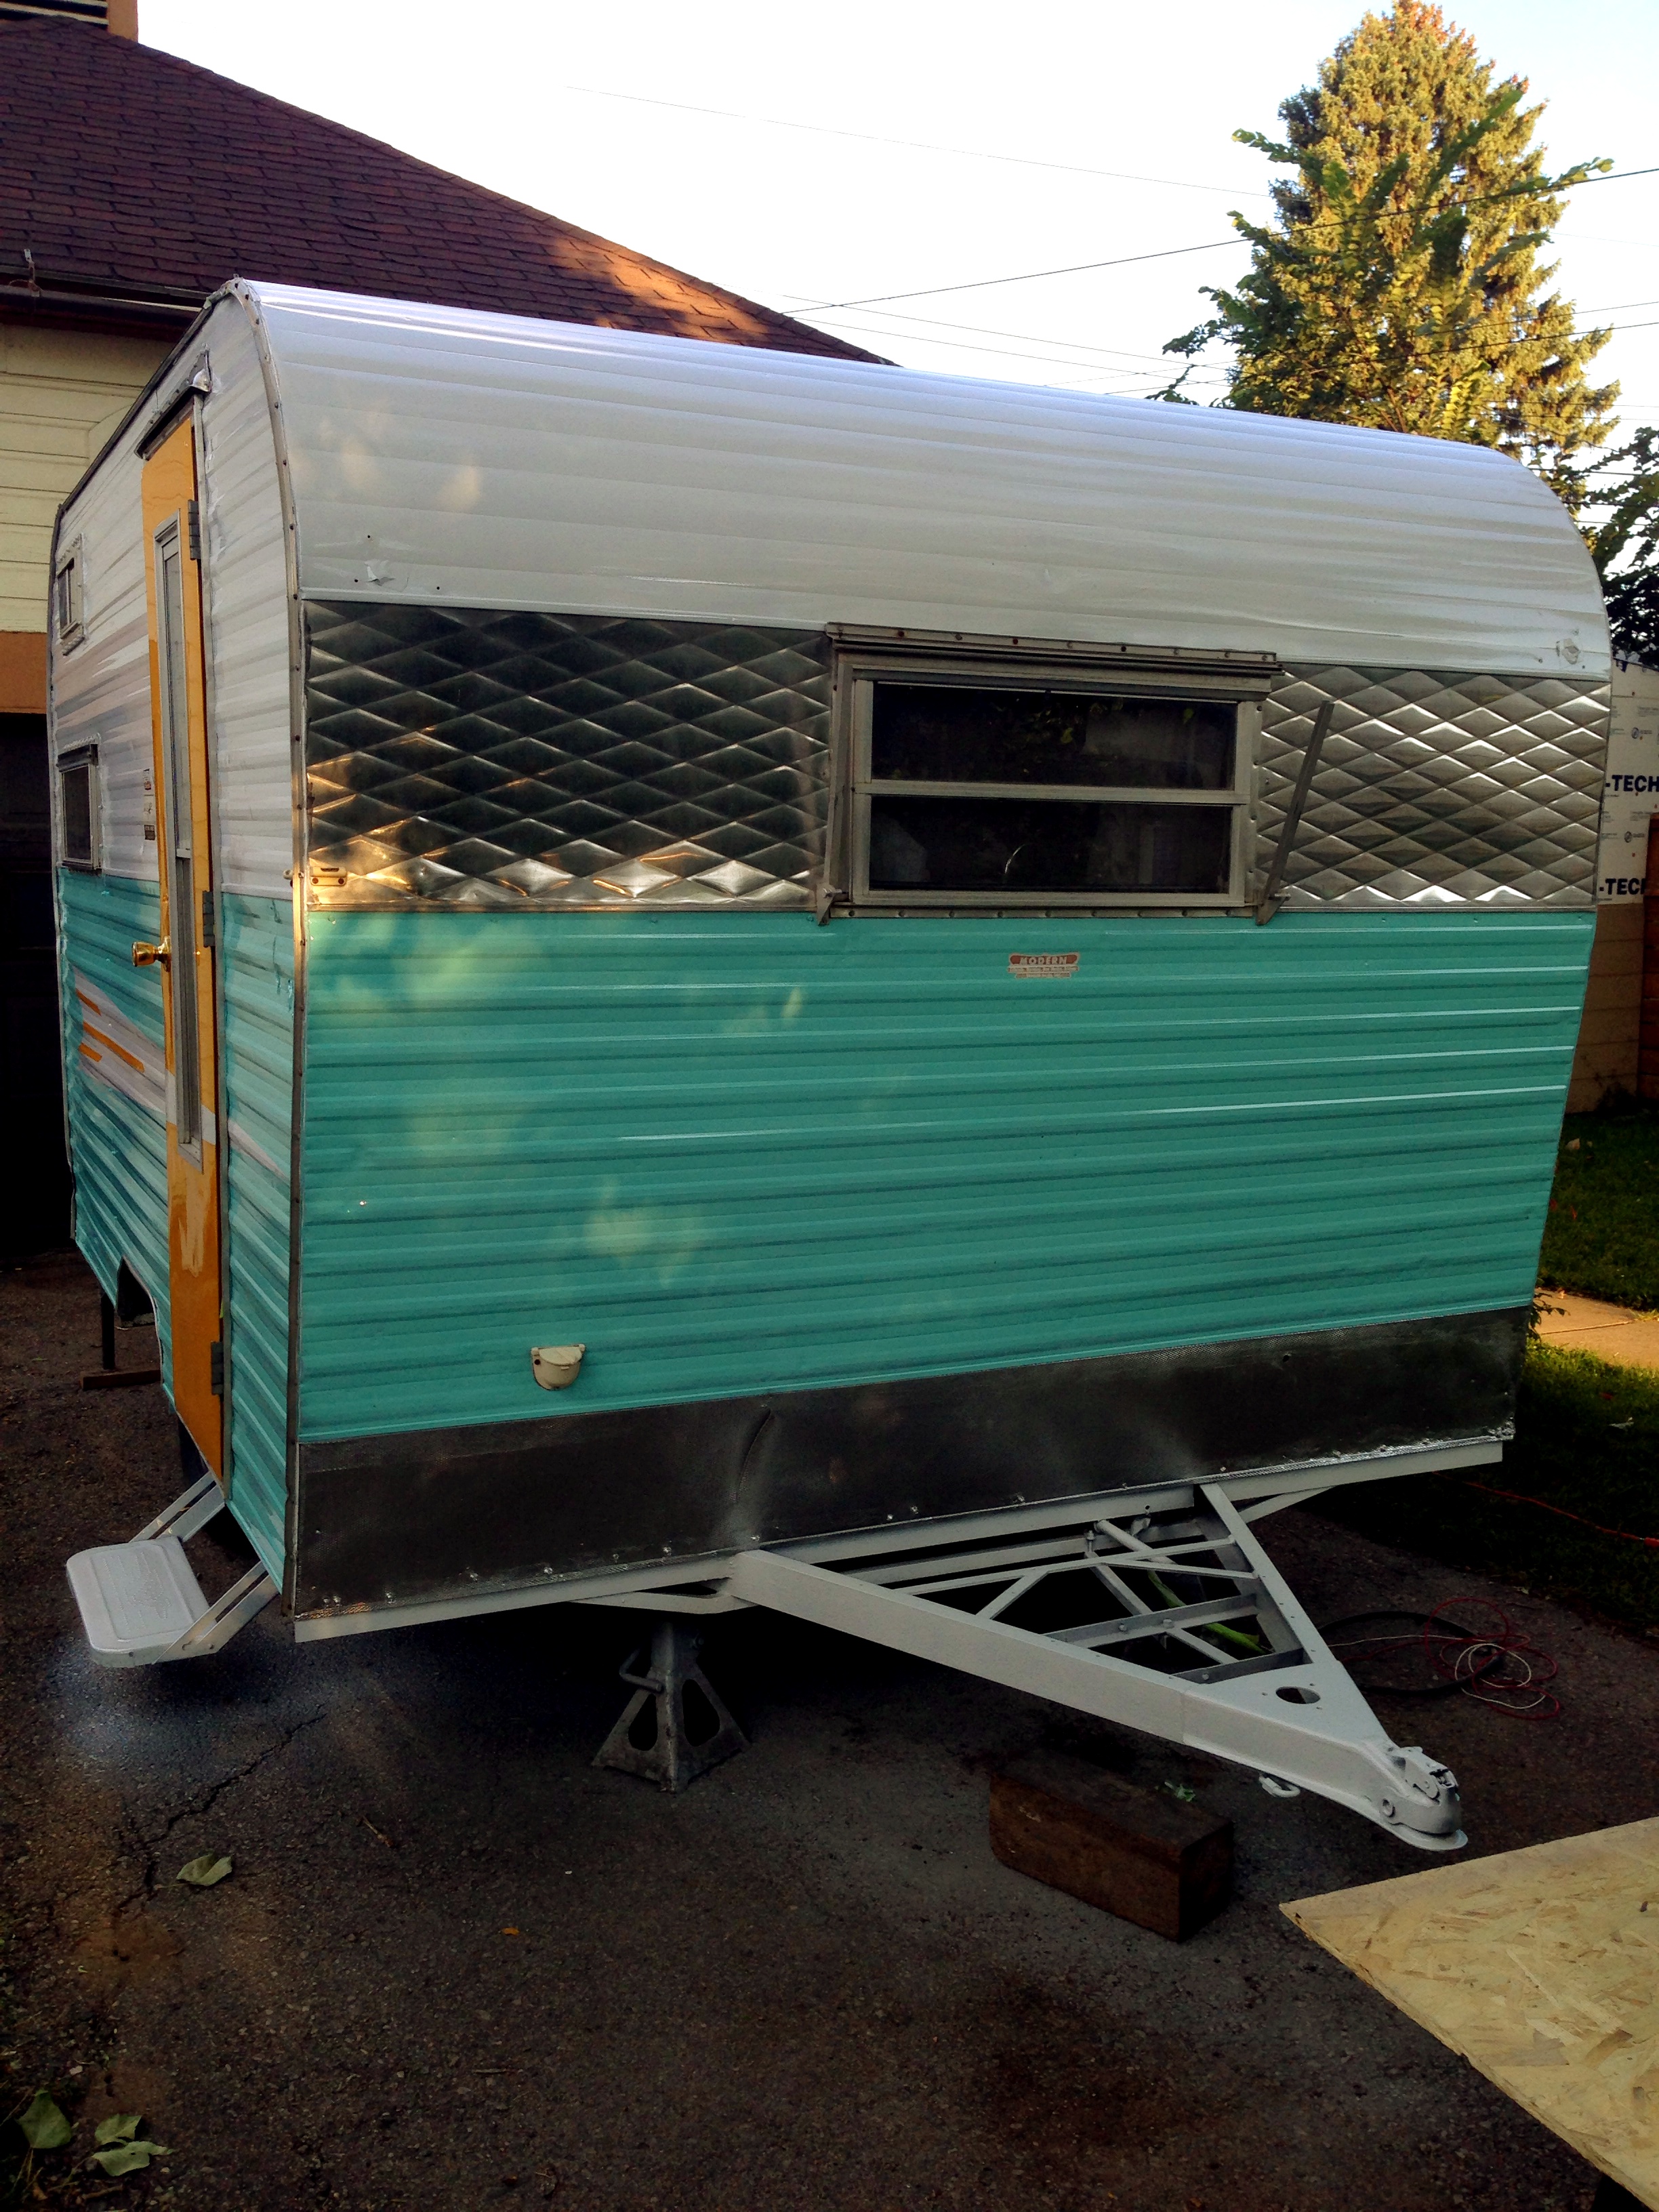
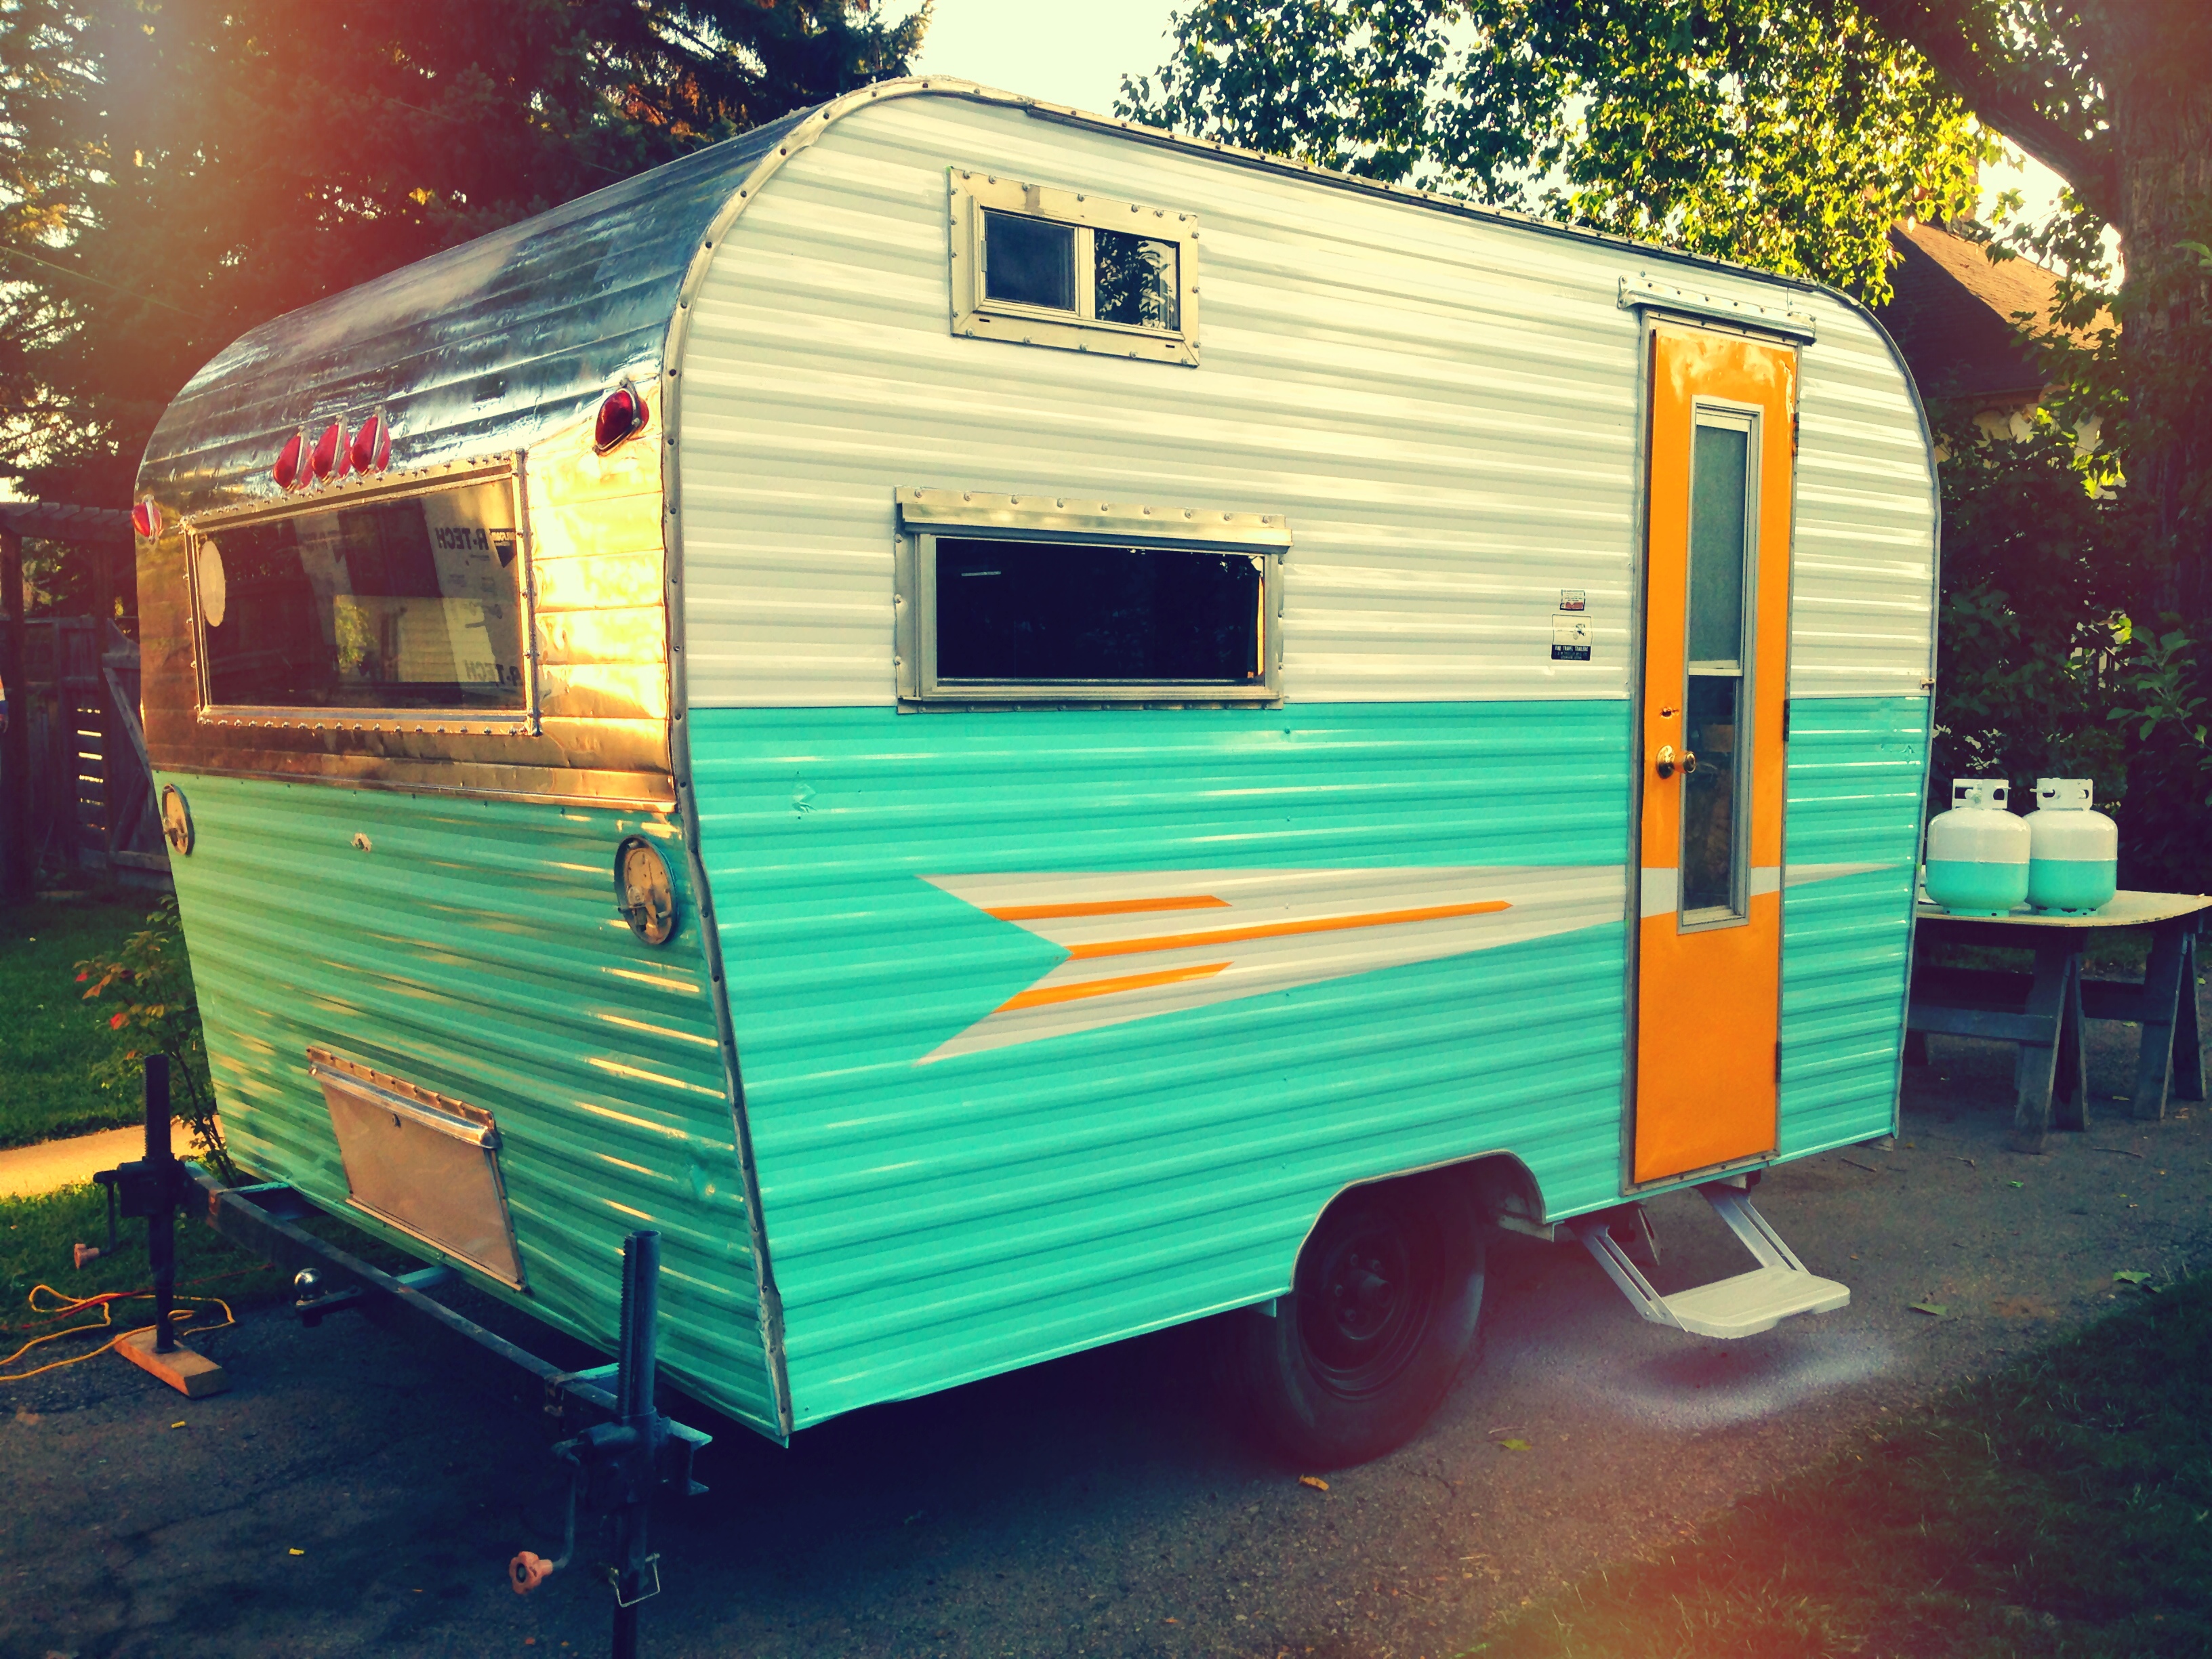
Mid-Century Myrtle!!

RoadRunner arrow

I didn’t even realize there was a stylized RoadRunner embossed into the metal step until we painted it white 🙂
Before and after shots -a mighty improvement for Miss Myrtle:

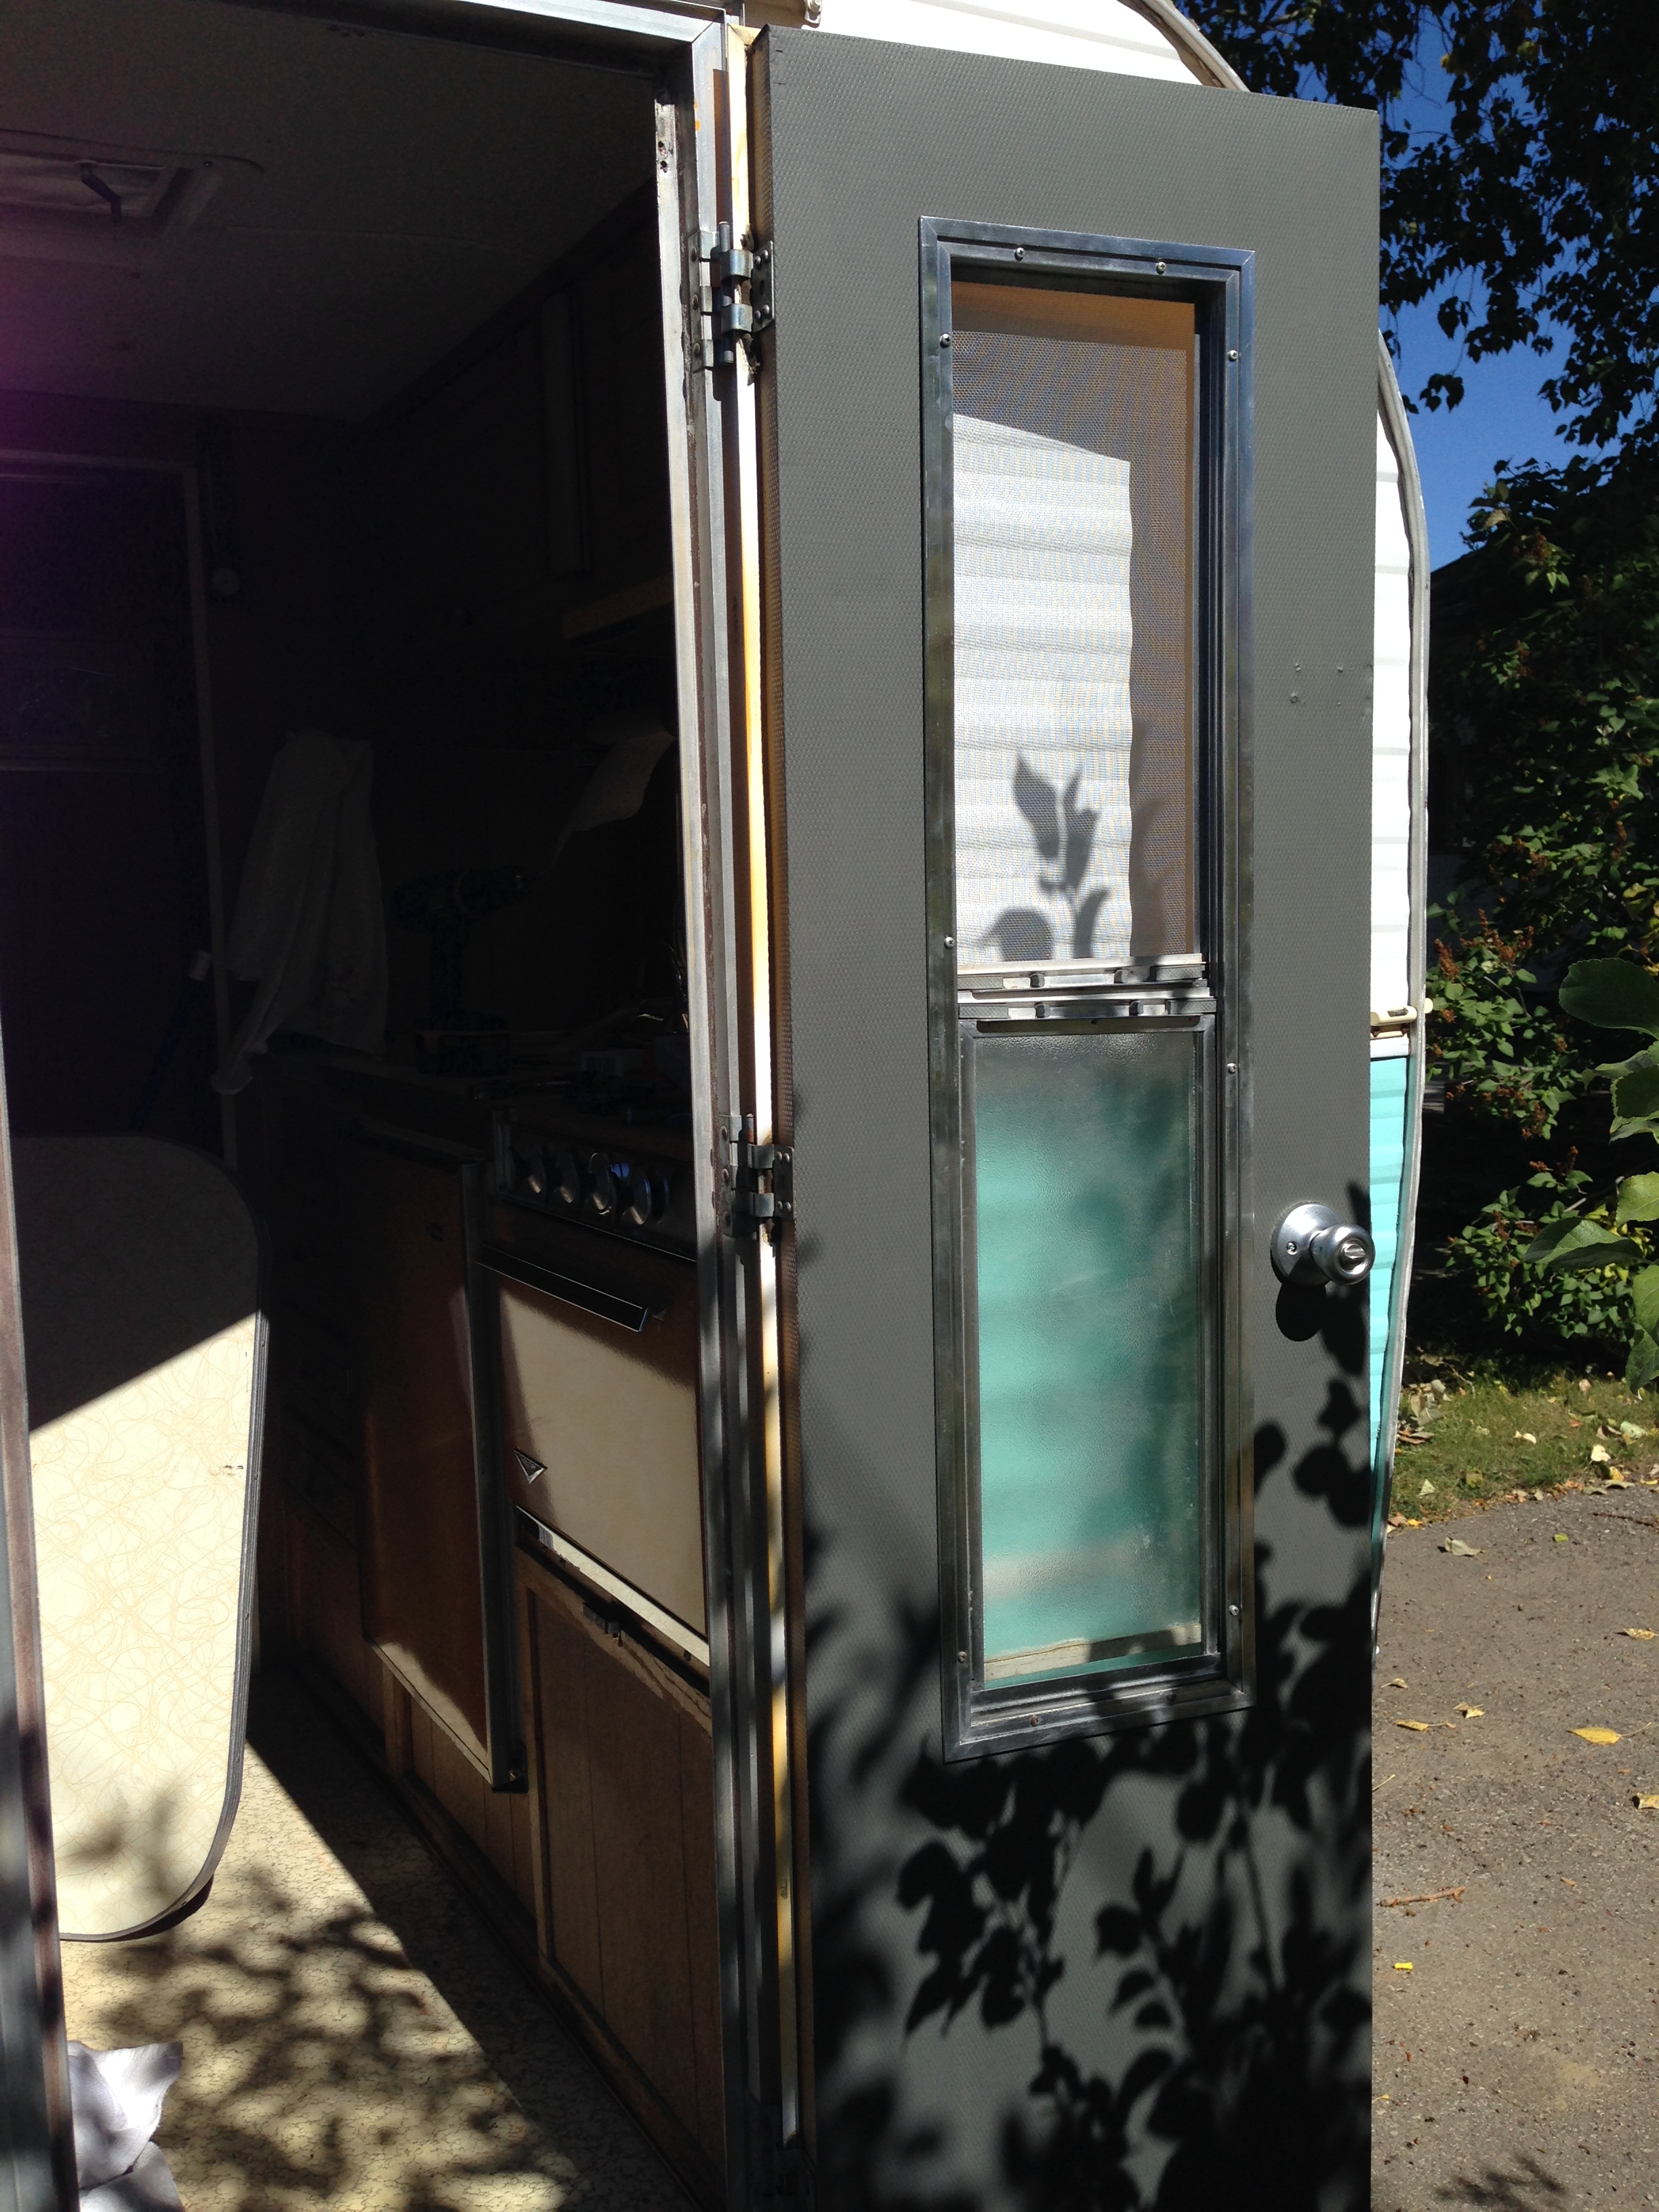
Somewhere during the paint prep weekend, I had the window out of Myrtle’s door so I could replace the ripped screen, re-seal and clean the glass, and repair the lower portion, which wasn’t sliding correctly. Before re-installing the window, I seized the opportunity to paint the interior of Myrtle’s door with chalkboard paint. Some vintage travel trailers are blessed with beautiful wood doors, but Myrtle was not. Her door is a plywood shell with some sort of beige, plastic polymer on the interior, and aluminum skin on the exterior. The exterior received the awesome Atomic Tangerine treatment, and I felt the interior should get something equally fun. A chalkboard is always a good time.

In the picture below, Myrtle is still sporting the black steel bumper and enormous jacks that she came to us with. My understanding of the plan was that once we purchased and installed more appropriate jacks, the bumper would receive a white paint job, and Bob’s your uncle.

However, my understanding had failed to take into account that my husband had now had his hands on Myrtle, he was irrevocably involved, and there are certain things that his perfectionist nature cannot abide. One of these things apparently being a bumper that had never been properly welded to the trailer, and was twisted slightly askew. Nothing would do but that he had to build an entire, new steel bumper. And once she had a new bumper, he noticed the lack of a designated spare tire holder. (As we do not yet have a spare tire for Myrtle, the lack had never crossed my mind, I admit.) So he built and welded a custom spare tire holder from some steel scraps. I’m pretty sure he also picked up some sort of ball hitch to attach to the new bumper so we can pull the motorcycle trailer behind Myrtle, but I don’t think that’s been added on yet 🙂

Myrtle’s backside as originally purchased

Myrtle’s new, white painted, steel bumper with tire holder. I love how the tire holder looks like a nautical anchor! Also installed, BAL stabilizing jacks with flying saucer foot pads 🙂

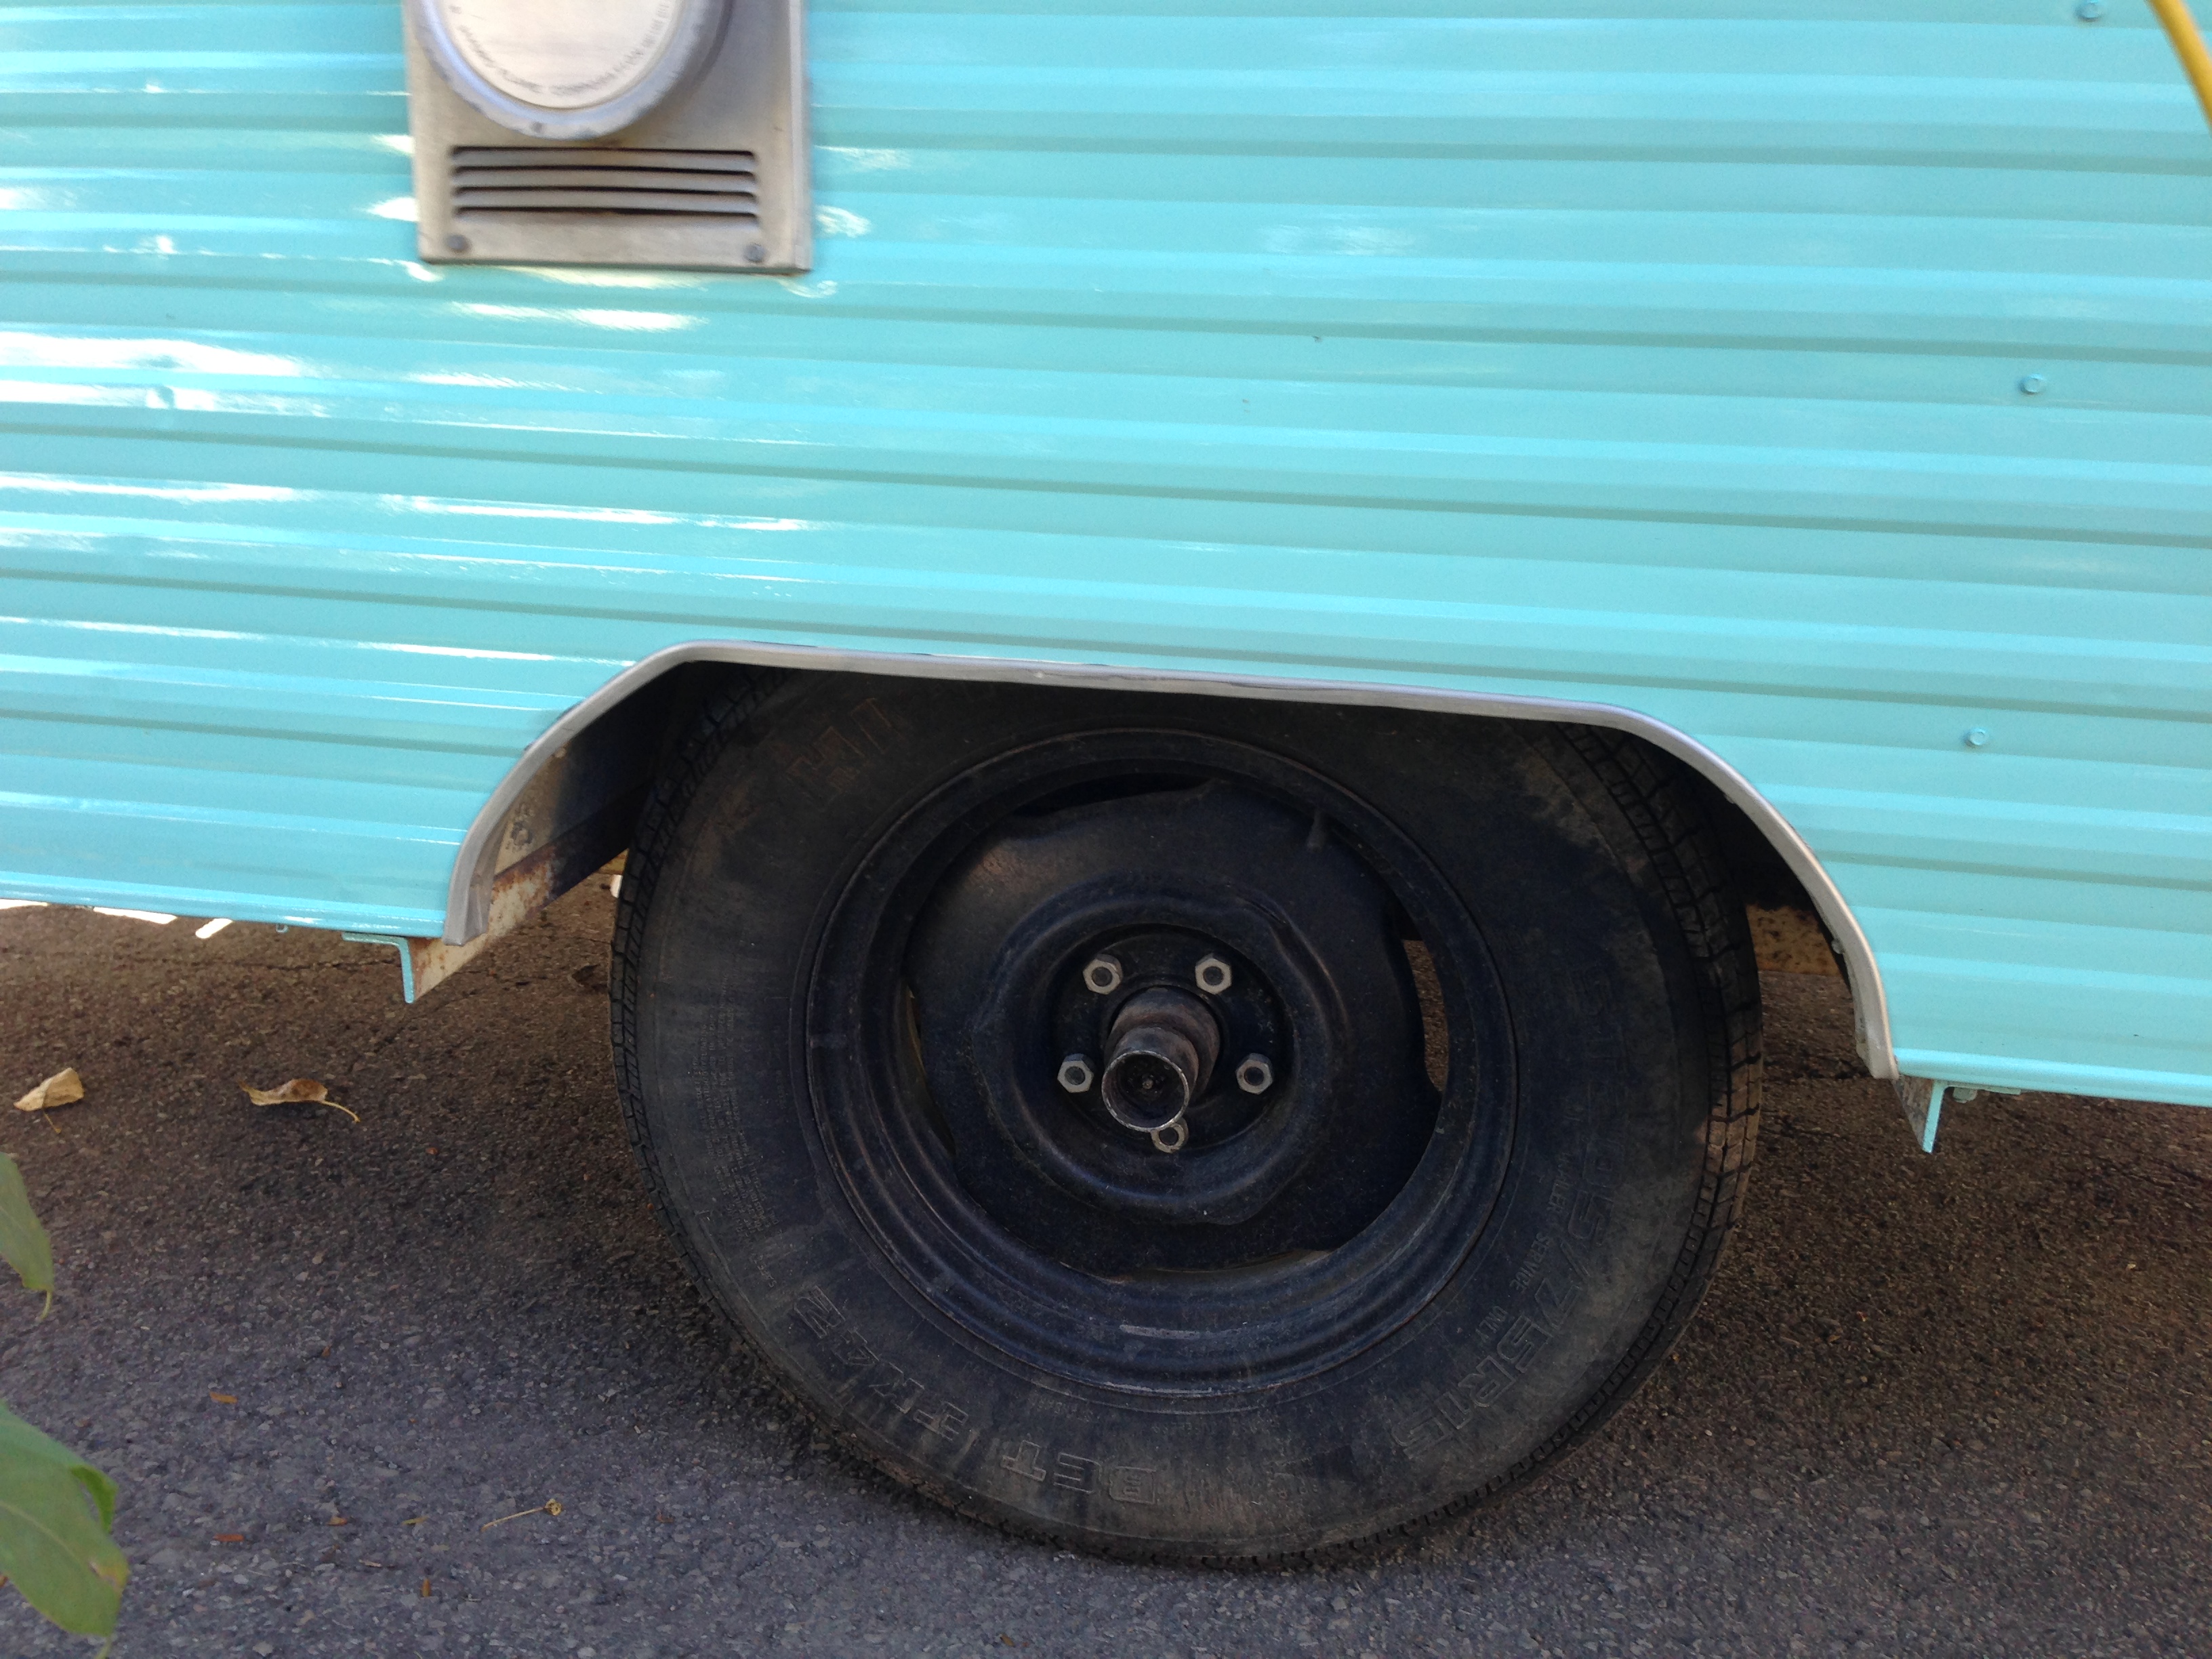
While my husband worried about Myrtle’s rear-end (snort!), I worried about her feet, or rather her tires. She actually came with very good, trailer designated tires, but they weren’t sporting much of a vintage look. I didn’t want to replace perfectly good tires just to have white rims, so I faked it. Industrial strength white paint on the wheel wells, and a set of baby moon hubcaps were just what she needed to complete her style’n, retro look.
Meh

Improvement

Love those Baby Moons!
All exterior work on Myrtle was completed before winter, and progress on the interior continues. She and I wait impatiently for Spring, because Myrtle is heartily sick of the snow.

 Next entry teaser -in which I disassemble and scrub hell out of Myrtle’s 70’s era Winnebago porta-potty over the holiday weekend! (That probably had to be the most fun you can have with your vintage travel trailer.)
Annnnd, discover two more severely leaky windows. Luckily I had a ton of butyl putty tape…

Where did you get your Butyl putty tape. I need some also.
We picked it up from an RV dealer / supply store.
She is gorgeous! I have a 62 with no name yet. We got lucky and got her from my dad in Colorado that was used for a hunting camper/ he fixed everything. It has the turquoise appliances and is in great shape. Thanks for the photos.
Love it! Thanks for sharing.
Y’all have done a fantastic job so far!! Love it!
Awesome blog and reno! I came across this looking for info on ROAGs as my wife and I recently came into a 1969 15fter. Question, what size spare did you end up going with? Also do you know any other useful resources online as to where I can find an owner’s manual? Thanks!
Thank you! I believe we went with a 215/70-15 for the spare. Also, as far as I can tell, ‘ROAG’ is an acronym that appears on the titles of many of the RoadRunners, but I think they were all L&M RoadRunners. I’ve never found an owner’s manual, online or otherwise, for the RoadRunner travel trailer… 😦
Absolutely amazing paint job!! Thabks for the much needed inspiration as I slog through my trailer reno!
soo excited to have found your blog! we just picked up a 1971 LARK 16′ camper and it is our winter project. your blog is full of inspiration and ideas and answers to questions we have! thank you!!
Glad you enjoyed! 🙂
I love the paint scheme you chose, it’s stunning! My husband is just finishing up the remodel of our 1968 Serro Scotty canned ham. It’s almost time to paint and this was the color I had in mind. Would it be possible to get the paint codes and brand from your husband? I’d like to match your colors. They looks so vibrant. Thank you! Violet
Hi Violet,
We don’t actually have any sort of paint code -it was kind of a convoluted process. I wanted to match a vintage wall clock that I had, because it was the shade of turquoise I had in mind, and I found a house paint card that was a close match to it at Home Depot. My husband scanned the card on the paint scanner where he works, and came up with the auto paint color that way, but didn’t save the formula. I want to say the paint card we matched was called Island Oasis, but I can’t remember if that was actually what I used on the interior. I do remember that the orange paint card I matched for the exterior arrow and door was called Atomic Tangerine 🙂
What an amazing story! Thank you for giving us your Miss Myrtle story! I’m looking to create my own as soon as we find our very own Miss Myrtle! Have a blessed life!
Jewels
I LOVE THIS!! We just got my GF’s parents camper that she grew up in and these are the colors i was wanting to repaint it. im so glad i found this!
What kind of automotive paint did you use?
Dupont Automotive Paint 🙂
Love your camper! Today we bought a 1968-69? Roadrunner. I love the polished roof. Why did you do that? We have a leak, and need to replace the roof, and I am showing your camper to my husband to see if he likes it! I love the look you acheived!
Hi! It’s possible our Roadrunner originally had a polished roof, only the bottom section was painted when we got it. I liked the look of it, so we just polished it back up 🙂